Setting Up Advisee Roster
Important
Information and features vary according to the roles to which you belong and the permissions associated with those roles. For more information, contact your module manager or your campus support team.
The Advisee Roster feature allows the advisor to see a list of their advisees and to view information about a selected advisee. Information about the advisee is available via links to the following Student features/screens if the Allow Access global permission is granted to the advisor for the individual features.
My Advisor Meetings
My Course History
My Course Needs
Add/Drop Courses
My Degree Progress
Financial Aid Awards
Financial Aid Document Tracking
My GPA Projection
Grade Report
Major Exploration
My Residence Info
My Course Schedule
My Unofficial Transcript
J1 Desktop Setup
Perform the following steps to configure EX to support the Advisee Roster feature.
Open the Registration Configuration window.
In the Recalculate Academic Record Controls group box, choose the Number of Decimal Places to Use in GPA.

Click the Save button on the main menu.
Open the UI Configuration window, and choose Advising from the Category Name drop-down.
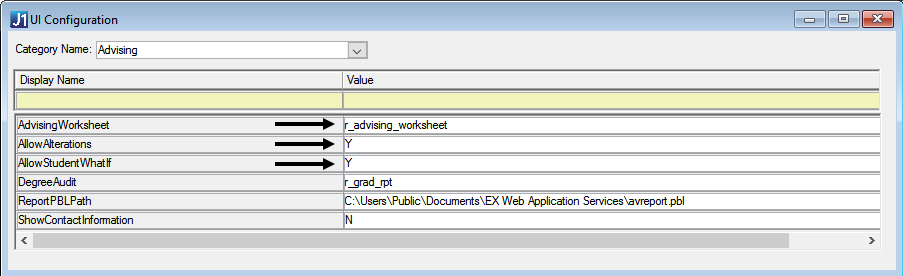
Locate the AdvisingWorksheet row, and enter the name of the Advising Worksheet to be run from the Campus Portal.
Locate the AllowAlterations row, and indicate whether an Advisor can alter student requirements.
Locate the AllowStudentWhatIf row, and indicate whether the Recalc button can be displayed. The Recalc button invokes the Advising Engine.
Locate the DegreeAudit row, and enter the name of the Degree Audit report to be run from the Campus Portal.
Locate the ReportPBLPath row, and enter the path and InfoMaker PBL that contains reports to be viewed from the Campus Portal.
Locate the ShowContactInformation row, and indicate whether you want to show contact information on the Advisee Detail page in the Campus Portal.
Open the Division Definition window, and select the Show on Web checkbox for all divisions you want to appear in the Default Advisee Division drop-down options on the Preferences tab of the Admin Toolbar.
Open the Year Term Subterm window.
On the Year/Term tab, highlight the appropriate row.
Click the Advisor Add/Drop Dates Override tab. The Year, Term, Census Date, First Web Add/Drop Date, and Last Web Add/Drop Date for the selected row are displayed in the heading of the tab. This tab allows your institution to set add/drop dates that allow advisors to add and/or drop courses for their advisees after the add/drop period for the student has expired. Therefore, these dates are different from the add/drop period the advisee sees when they log in. The add/drop period defined on this tab allows advisors to work with a student's registration records after the student can no longer add/drop courses.
Choose Add Row from the right-click options.
Enter the Advisor ID.
Enter (or select from the right-click Calendar option) the First Add Date and Last Add Date. These dates establish a time frame in which only this advisor (not students) can add courses for their advisees. This add period overrides the add period seen by students.
Enter (or select from the right-click Calendar option) the First Drop Date and Last Drop Date. These dates establish a time frame in which only this advisor (not students) can drop courses for their advisees. This drop period overrides the drop period seen by students.
Click the Save button on the main menu.
Repeat steps i-v to add additional advisors.
Open the Degree/Aim Cross Reference window.
Select the Display on Web checkbox for each Requirement you want to be displayed in the Major/Minor drop-down list on the Major Exploration and What If feature in the Campus Portal.
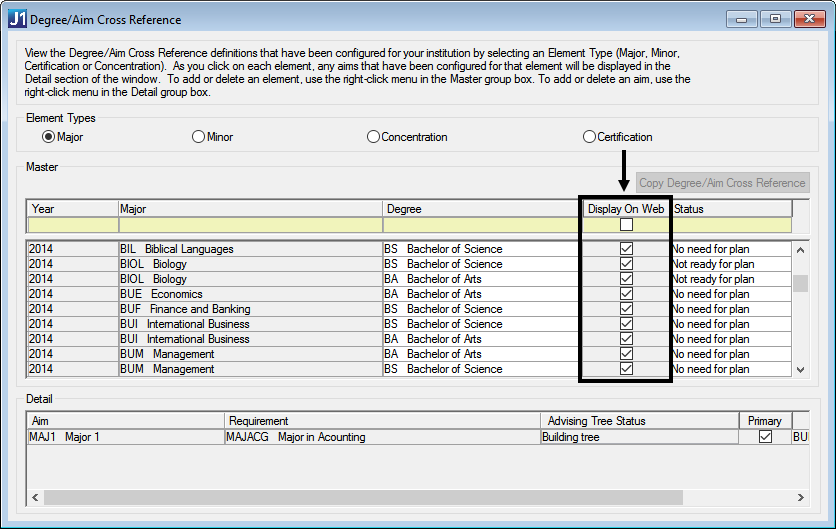
Click the Save button on the main menu.
Open the Hold Setup window.
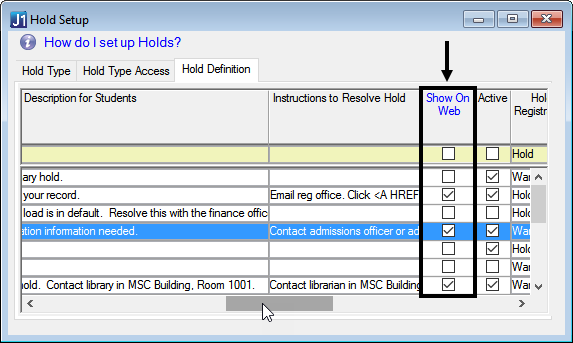
Click the Hold Definition tab.
Select the Show on Web checkbox for each Hold Code to be displayed in the Advisee Roster feature in the Campus Portal.
Click the Save button on the main menu.
Campus Portal Setup
Log in to the Campus Portal as an administrator and navigate to the appropriate feature page.
From the Admin Toolbar
 , click Access. The Access page appears. Campus Portal roles that have access to that page are indicated by a green visible
  symbol while roles that do not have access are indicated by the red hidden
  symbol.
Click on the Campus Portal role you are setting up permissions for. If the role has not already been granted access to the page, click the button to toggle it to Visible
 . Additional permissions appear.
To grant administrative privileges to a Campus Portal role, click the button for the Allow this role to manage this page permission to move the toggle to "Yes". Administrative permissions will allow the users in the role to add or remove features and set page and feature level permissions.
From the Admin Toolbar, click Access. The Access page appears.
Click on the Campus Portal role you are setting up permissions for. If the role has not already been granted access to the page, click the button to toggle it to Visible
. additional permissions appear.To grant administrative privileges to a Campus Portal role, click the button for the Allow this role to manage this page permission to move the toggle to "Yes" . Administrative permissions will allow the users in the role to add or remove features and set page and feature level permissions.
From the Admin Toolbar, click Settings. The Settings page appears.
In the Default Student Life Term drop-down, choose the default status you want displayed for the search criteria in the Advisee Roster feature when the feature is first opened.
Click Save Changes.