Working with Questions
You can add any of the allowed question types to your forms. The process is similar regardless of the type of question you are adding. You can add questions by creating them or by importing them from existing forms. You can also modify and delete questions.
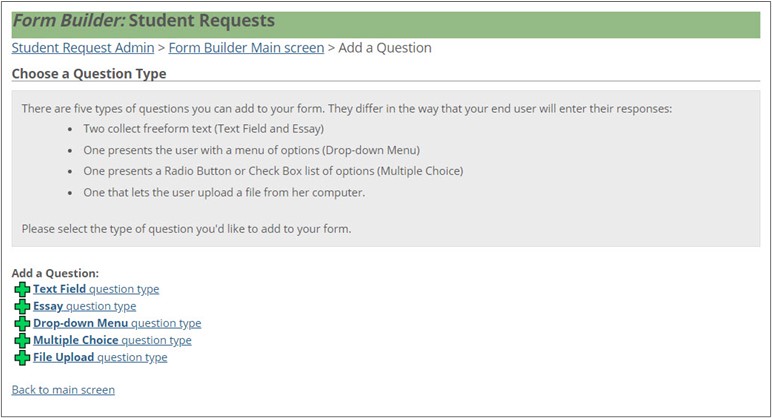
Form Builder allows you to create five question types: Text Field, Essay, Drop-Down Menu, Multiple Choice, and File Upload.
 |
Open the form for editing.
Navigate to the appropriate section and click Add a new Question link. The Choose a Question Type screen displays several options.
Tip
You can click the Select a new question type link at any time prior to saving the new question to return to the Choose a Question Type screen.
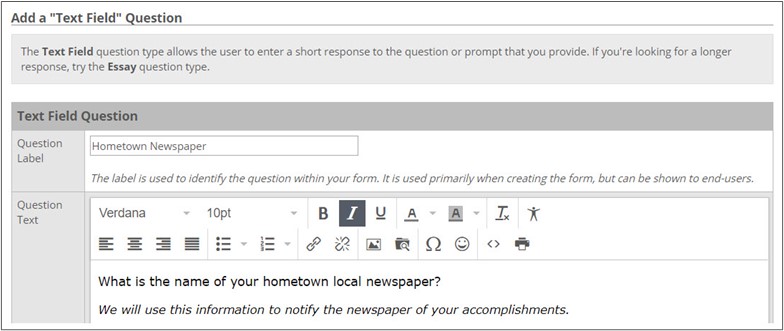
Click the Text Field question type link. The Add a "Text Field" Question page is displayed.
In the Question Label field, enter a label for the question. An entry in this field is required. You should enter a name that is meaningful, as this is the label that identifies the question within Form Builder. It might also be displayed to end users in some situations.
In the Question Text field, enter the question to be displayed on the form. An entry in this field is required. You can use the formatting tools at the top edge of the text box to change the font of your text, add emoticons, etc.
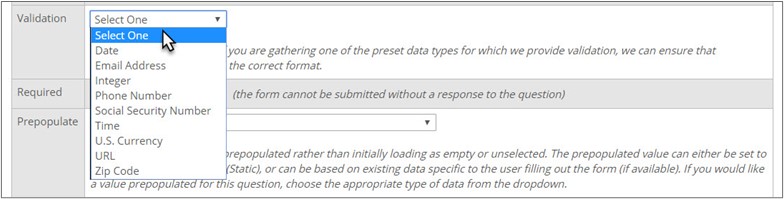
If you want the user’s answer to adhere to a specific format already defined, select the desired option in the Validation drop-down menu.
Notice
If you want the user to enter an e-mail address, use the Validation list to ensure the address is entered in standard e-mail address format.
Note
The options available in the Validation drop-down menu may be disabled once you map this question to a table; that is, if you map to a column that is defined as a certain data type, that data type may override the formats available in the Validation list.
Notice
If you later map a question to a column with a "date" data type, the user’s response must be submitted in date format. In this case, if you had previously specified some other option with the Validate drop-down menu, that choice is not used by the system.
If you want the question to be required, select the Required checkbox.
In the Prepopulate field, indicate if and how you want the question to be pre- populated.
You can choose to have the question be pre-populated with data about the user that may already exist in the J1 database. To pre-populate the question with data for the user, select a database column from the Prepopulate drop-down menu from which to retrieve the data from the database. The choices available in this list are determined by settings that were selected in the Is Available to Pre-populate column on the Manage Mapping Tables window in the J1 Desktop Common module (Task | Internet Configuration | Manage Mapping Tables).
There may also be several options available at the end of the column list in the Prepopulate drop-down menu that pre-populate a question with variable data. Following is a list of the possible variable options, the data that is returned for each, and the forms to which it is applicable:
Variable Option
Data Returned
Applicable Forms
ID Number
Returns the ID of the person for whom the data is being updated
All forms
Current Date
Returns the current date
All forms
Current Date and Time
Returns the current date and time
All forms
Current Time
Returns the current time
All forms
Gift Category (computed)
Returns a combined code consisting of
cat_comp_1 + '-'
+ cat_comp_2
Donor Profiles forms
REG_CONFIG.CUR_YR_DFLT
Returns the value defined as the current default year code from the REG_CONFIG table
Student Forms
REG_CONFIG.CUR_TRM_DFLT
Returns the value defined as the current default term code from the REG_CONFIG table
Student Forms
TW_REG_CONFIG.DFLT_YR_CDE
Returns the value defined as the current default year code from the TW_REG_CONFIG table
Student Forms
TW_REG_CONFIG.DFLT_TRM_CDE
Returns the value defined as the current default term code from the TW_REG_CONFIG table
Student Forms
If you want to define a default value that to display for all users entering data in the form rather than being a piece of data that is specific to the ID/name for whom the data is being updated/submitted, select the Static option and enter the default value to be used in the Static value edit box, which is displayed when the Static option is selected.
A fourth pre-populate option is to populate the question dynamically.
Note
The Dynamic (selected via SQL from a database) pre- populate option is currently only available for the Text Field type of question.
Select the Dynamic (selected via SQL from a database) option from the Prepopulate drop-down menu.
Enter a query into the Enter your SQL statement text box.
You may use another question's response to determine the value to be used to pre-populate the question, or you may use the logged in user's ID or the user ID of the person for whom the submission is being made, as in the case where an advisor is submitting a Personal Info Update on behalf of a student.
If you do not wish for the question to be pre-populated, leave the Prepopulate option set to None.
You can define any pre-populated question to be "read only" by selecting the Read only checkbox that is displayed to the right of the Prepopulate drop-down menu.
If you want the end user to have the option of looking up a business, church, company, etc., that is already in your J1 database, select the appropriate type from the Lookup drop-down menu.
If you select the None option, the Search for a <x> link does not display on the form. The lookup options and a description of each are detailed below:
Lookup
Description
Business/ Organization
Used to look for a business or organization in the J1 database Search criteria are Name, City, State, and ZIP.
By default, this option will search through any ID where
NAMEMASTER.NAME_FORMAT = 'B'Returns the ID_NUM and name for any ID matching the entered criteria.
Individual
Used to look for an individual in the J1 database Search criteria are First Name, Middle Name, Last Name, City, State and ZIP.
By default this option searches through any ID where
NAMEMASTER.NAME_FORMAT <> 'B'orNAMEMASTER.NAME_FORMATis null.Returns the ID_NUM and name for any ID matching the entered criteria.
Not Specified
Used to populate mapping columns where the user might select either a person or a business/organization; updates to the Relationship table via the Donor Profiles forms is a good example of where the Not Specified lookup option would be used.
Search criteria for an Individual are First Name, Middle Name, Last Name, City, State and ZIP; search criteria for a Non-Individual are Name, City, State, and ZIP.
If the Individual option is selected on the search prompt, the Individual query is used; if the Non-Individual option is selected, the Business/Organization query is used.
Returns the ID_NUM and name for any ID matching the entered criteria.
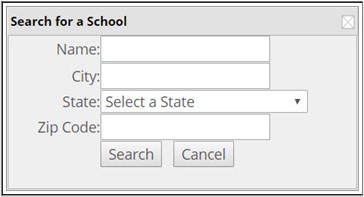
School
Used to look for a school in the J1 database Search criteria are Name, City, State and ZIP.
By default this option will search for any ID in NAMEMASTER where
NAMEMASTER.NAME_FORMAT = 'B'andORG_MASTER.SCHOOL_TYPEis not null.Returns the ID_NUM and name for any ID matching the entered criteria
School by Org Code
Used to look for a school in the J1 database Search criteria are Name, City, State and ZIP.
By default this option searches for any ID in NAMEMASTER where
NAMEMASTER.NAME_FORMAT = 'B'andORG_MASTER.SCHOOL_TYPEis not null.Returns the
ORG_MASTER.ORG_CDEand name for any ID matching the entered criteria.Allows for the selection of an org_cde for a school as a response to a question that is mapped to
DEGREE_HISTORY.DEGR_EARNED_AT.Note
It is recommended that you do not use the Individual or Unspecified options on outward facing forms. For example, you would not want a candidate being able to search for any person in your database using the Individual lookup option. You may also choose to only use the Business/Organization lookup option on forms that are available to school staff and faculty.
Use the Orientation field to specify how the question text will be positioned relative to the field where the user enters a response.
To position the question to the left (see the below example), click the Horizontal radio button.
To position the question above the response field (see the below example), click the Vertical radio button.
If you want to view the details of the question or see a preview of how it would appear on a form, click the Preview this question link.
From the View a Question screen, you can Edit this question, which returns you to the Add a "Text Field" Question page or click the Back to previous screen link, which also returns you to the Add a "Text Field" Question page.
Click Save. The system saves the question and again displays the main editing page for this form.


Open the form for editing.
Navigate to the appropriate section, and click Add a new Question link. The Choose a Question Type screen displays several options.
Note
You can click the Select a new question type link at any time prior to saving the new question to return to the Choose a Question Type screen.
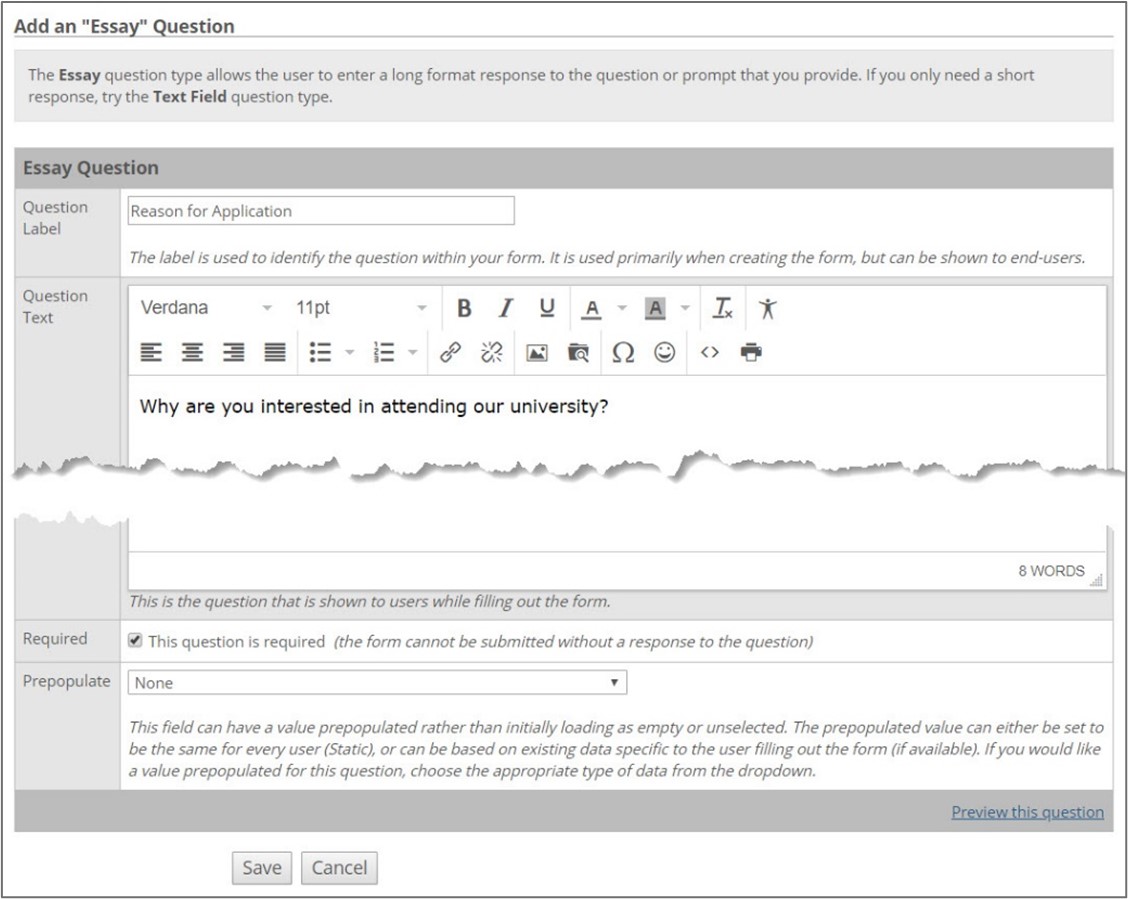
Click the Essay question type link. The Add an "Essay" Question page is displayed.'
In the Question Label field, enter a label for the question. An entry in this field is required. You should enter a name that is meaningful, as this is the label that identifies the question within Form Builder. It might also be displayed to end users in some situations.
In the Question Text field, enter the question to be displayed on the form. An entry in this field is required. You can use the formatting tools at the top edge of the text box to change the font of your text, add emoticons, etc.
If you want the question to be required, select the Required checkbox.
In the Prepopulate field, indicate if and how you want the question to be pre- populated.
You can choose to have the question be pre-populated with data about the user that may already exist in the J1 database. To pre-populate the question with data for the user, select a database column from the Prepopulate drop-down menu from which to retrieve the data from the database. The choices available in this list are determined by settings that were selected in the Is Available to Pre-populate column on the Manage Mapping Tables window in the J1 Desktop Common module (Task | Internet Configuration | Manage Mapping Tables).
There may also be several options available at the end of the column list in the Prepopulate drop-down menu that pre-populate a question with variable data. Following is a list of the possible variable options, the data that is returned for each, and the forms to which it is applicable:
Variable Option
Data Returned
Applicable Forms
ID Number
Returns the ID of the person for whom the data is being updated
All forms
Current Date
Returns the current date
All forms
Current Date and Time
Returns the current date and time
All forms
Current Time
Returns the current time
All forms
Gift Category (computed)
Returns a combined code consisting of
cat_comp_1 + '-'
+ cat_comp_2
Donor Profiles forms
REG_CONFIG.CUR_YR_DFLT
Returns the value defined as the current default year code from the REG_CONFIG table
Student Forms
REG_CONFIG.CUR_TRM_DFLT
Returns the value defined as the current default term code from the REG_CONFIG table
Student Forms
TW_REG_CONFIG.DFLT_YR_CDE
Returns the value defined as the current default year code from the TW_REG_CONFIG table
Student Forms
TW_REG_CONFIG.DFLT_TRM_CDE
Returns the value defined as the current default term code from the TW_REG_CONFIG table
Student Forms
If you want to define a default value that to display for all users entering data in the form rather than being a piece of data that is specific to the ID/name for whom the data is being updated/submitted, select the Static option and enter the default value to be used in the Static value edit box, which is displayed when the Static option is selected.
A fourth pre-populate option is to populate the question dynamically.
Note
The Dynamic (selected via SQL from a database) pre- populate option is currently only available for the Text Field type of question.
Select the Dynamic (selected via SQL from a database) option from the Prepopulate drop-down menu.
Enter a query into the Enter your SQL statement text box.
You may use another question's response to determine the value to be used to pre-populate the question, or you may use the logged in user's ID or the user ID of the person for whom the submission is being made, as in the case where an advisor is submitting a Personal Info Update on behalf of a student.
If you do not wish for the question to be pre-populated, leave the Prepopulate option set to None.
You can define any pre-populated question to be "read only" by selecting the Read only checkbox that is displayed to the right of the Prepopulate drop-down menu.
If you want to view the details of the question or see a preview of how it would appear on a form, click the Preview this question link. From the View a Question screen, you can Edit this question, which returns you to the Add an "Essay" Question page, or click the Back to previous screen link, which also returns you to the Add an "Essay" Question page.
Click Save. The system saves the question and again displays the main editing page for this form.
Open the form for editing.
Navigate to the appropriate section and click the Add a new Question link. The Choose a Question Type screen displays several options.
Note
You can click the Select a new question type link at any time prior to saving the new question to return to the Choose a Question Type screen.
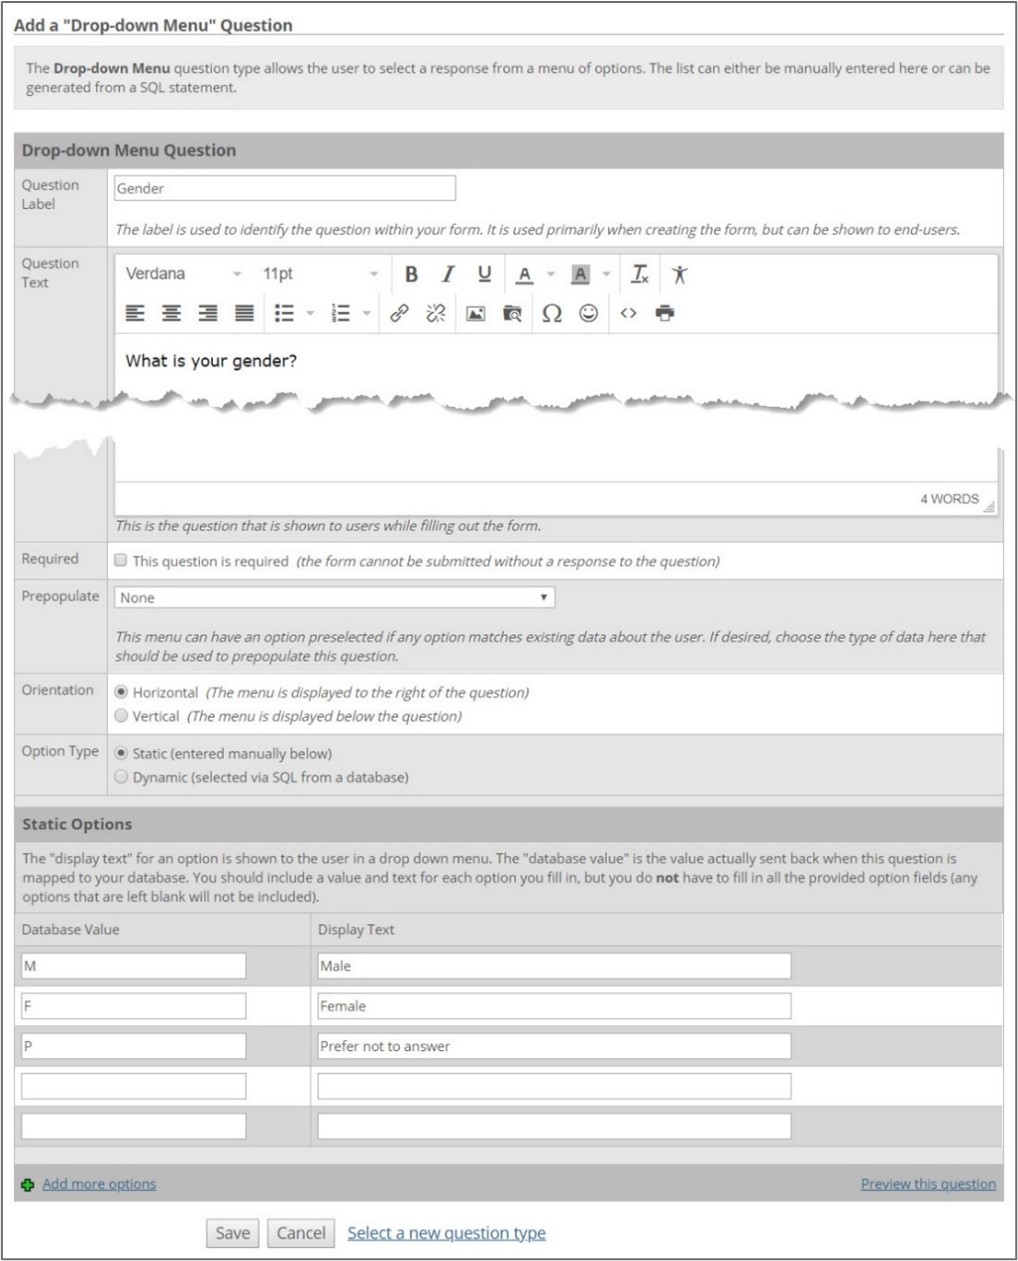
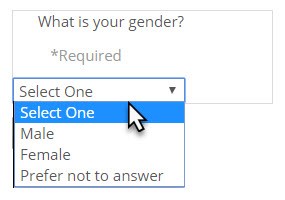
Click the Drop-down Menu question type link. The Add a "Drop-down Menu" Question page is displayed.
In the Question Label field, enter a label for the question. An entry in this field is required. You should enter a name that is meaningful, as this is the label that identifies the question within Form Builder. It might also be displayed to end users in some situations.
In the Question Text field, enter the question to be displayed on the form. An entry in this field is required. You can use the formatting tools at the top edge of the text box to change the font of your text, add emoticons, etc.
If you want the question to be required, select the Required checkbox.
In the Prepopulate field, indicate if and how you want the question to be pre- populated.
You can choose to have the question be pre-populated with data about the user that may already exist in the J1 database. To pre-populate the question with data for the user, select a database column from the Prepopulate drop-down menu from which to retrieve the data from the database. The choices available in this list are determined by settings that were selected in the Is Available to Pre-populate column on the Manage Mapping Tables window in the J1 Desktop Common module (Task | Internet Configuration | Manage Mapping Tables).
There may also be several options available at the end of the column list in the Prepopulate drop-down menu that pre-populate a question with variable data. Following is a list of the possible variable options, the data that is returned for each, and the forms to which it is applicable:
Variable Option
Data Returned
Applicable Forms
ID Number
Returns the ID of the person for whom the data is being updated
All forms
Current Date
Returns the current date
All forms
Current Date and Time
Returns the current date and time
All forms
Current Time
Returns the current time
All forms
Gift Category (computed)
Returns a combined code consisting of
cat_comp_1 + '-'
+ cat_comp_2
Donor Profiles forms
REG_CONFIG.CUR_YR_DFLT
Returns the value defined as the current default year code from the REG_CONFIG table
Student Forms
REG_CONFIG.CUR_TRM_DFLT
Returns the value defined as the current default term code from the REG_CONFIG table
Student Forms
TW_REG_CONFIG.DFLT_YR_CDE
Returns the value defined as the current default year code from the TW_REG_CONFIG table
Student Forms
TW_REG_CONFIG.DFLT_TRM_CDE
Returns the value defined as the current default term code from the TW_REG_CONFIG table
Student Forms
If you want to define a default value that to display for all users entering data in the form rather than being a piece of data that is specific to the ID/name for whom the data is being updated/submitted, select the Static option and enter the default value to be used in the Static value edit box, which is displayed when the Static option is selected.
A fourth pre-populate option is to populate the question dynamically.
Note
The Dynamic (selected via SQL from a database) pre- populate option is currently only available for the Text Field type of question.
Select the Dynamic (selected via SQL from a database) option from the Prepopulate drop-down menu.
Enter a query into the Enter your SQL statement text box.
You may use another question's response to determine the value to be used to pre-populate the question, or you may use the logged in user's ID or the user ID of the person for whom the submission is being made, as in the case where an advisor is submitting a Personal Info Update on behalf of a student.
If you do not wish for the question to be pre-populated, leave the Prepopulate option set to None.
You can define any pre-populated question to be "read only" by selecting the Read only checkbox that is displayed to the right of the Prepopulate drop-down menu.
Use the Orientation field to specify how the question text is positioned relative to the field where the user enters a response.
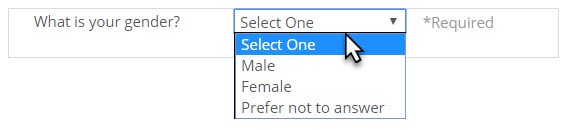
To position the question to the left (see the below example), click the Horizontal radio button.
To position the question above the response field (see the below example), click the Vertical radio button.
In the Option Type field, select Static or Dynamic.
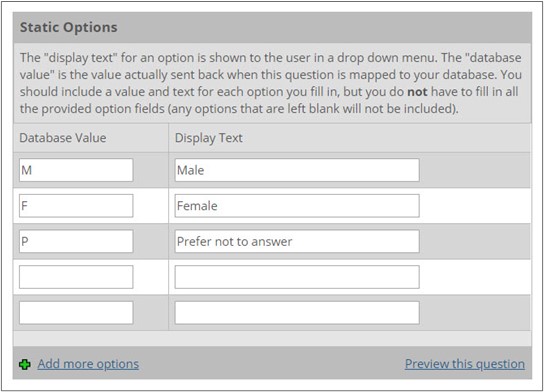
Selecting the Static option indicates that there are a pre-defined series of options that you always want to provide to the user. You can define the available options by completing the following steps in the Static Options area of the screen:
Enter the text that you want the user to see in the Display Text field.
Enter the corresponding code that you want saved to the database in the Database Value field.
Selecting the Dynamic option indicates that the options will always be selected via a SQL SELECT statement from the database.
Enter the appropriate SQL statement in the text area provided. The query should return two values: data to be displayed for the user (Display Text) and the corresponding code that should be saved to the database (the Database Value). The Database Value should be the first piece of data returned by the query, while the Display Text should be the second piece of data. If only one value is returned by the query, then that value is used as both the Database Value and the Display Text.
You can define a query that returns the same values all of the time (i.e., for a list of states). However, you can also define a query that is dependent upon some other value. The variables available for creating a dependent question are as follows:
A user's response to another question: Enter '{S#Q#}' in your query to indicate the section and question upon which to base the values of this drop-down menu.
The logged-in user's ID or the ID Number for whom the data is being updated, as in the case where an Advisor may be submitting an update for a student: Enter {UserID} in the query to use the ID as part of the query (i.e., the student's ID).
The logged-in user's ID if the user is submitting a form on someone else's behalf: Enter {AdminID} to use the ID of the third- party submitter (i.e., the Advisor's ID) in the query. For help creating a dependent question, select the Click here to read more links in the Dynamic Options section of the screen.
If this is not a dependent question, you can use the Test SQL command button to make sure that your query is valid.
If you want to view the details of the question or see a preview of how it would appear on a form, click the Preview this question link. From the View a Question screen, you can Edit this question, which returns you to the Add a "Drop-down Menu" Question page, or click the Back to previous screen link, which also returns you to the Add a "Drop-down Menu" Question page.
Click Save. The system saves the question and again displays the main editing page for this form.
Open the form for editing.
Navigate to the appropriate section and click the Add a new Question link. The Choose a Question Type screen displays several options.
Note
You can click the Select a new question type link at any time prior to saving the new question to return to the Choose a Question Type screen.
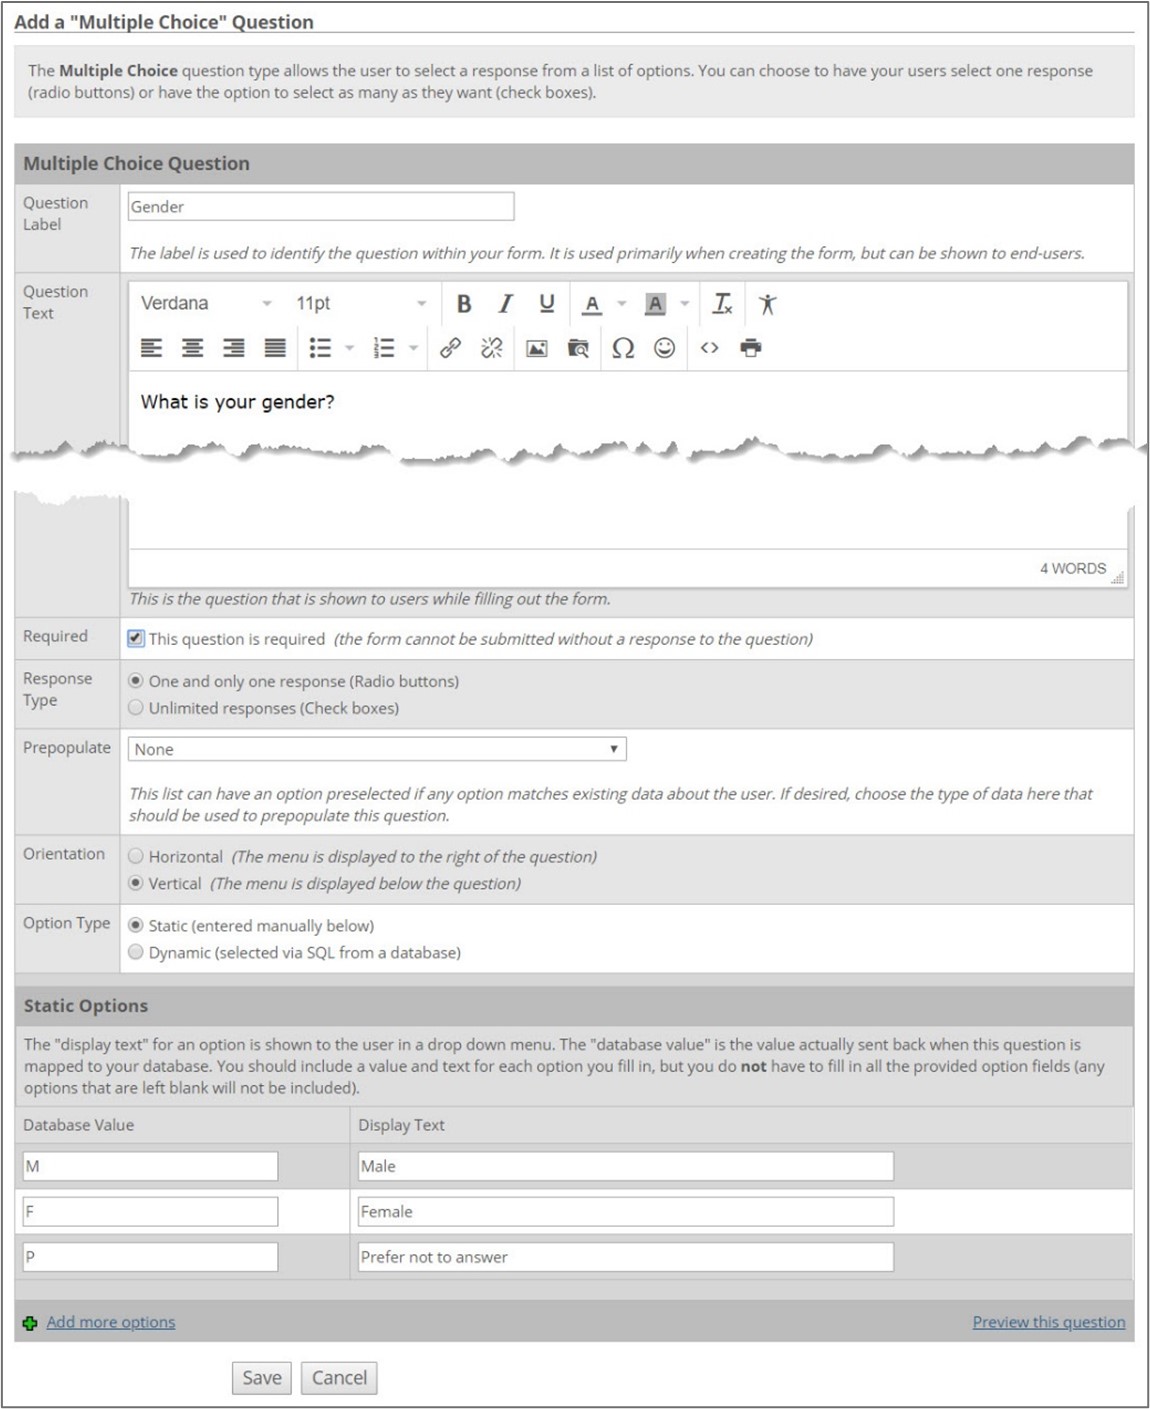
Click the Multiple Choice question type link. The Add a "Multiple Choice" Question page is displayed.
In the Question Label field, enter a label for the question. An entry in this field is required. You should enter a name that is meaningful, as this is the label that identifies the question within Form Builder. It might also be displayed to end users in some situations.
In the Question Text field, enter the question to be displayed on the form. An entry in this field is required. You can use the formatting tools at the top edge of the text box to change the font of your text, add emoticons, etc.
If you want the question to be required, select the Required checkbox.
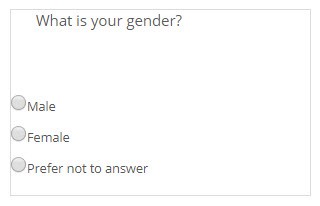
In the Response Type field, indicate whether the user can select more than one option (via checkboxes) or is restricted to one choice (via radio buttons).
In the Prepopulate field, indicate if and how you want the question to be pre- populated.
You can choose to have the question be pre-populated with data about the user that may already exist in the J1 database. To pre-populate the question with data for the user, select a database column from the Prepopulate drop-down menu from which to retrieve the data from the database. The choices available in this list are determined by settings that were selected in the Is Available to Pre-populate column on the Manage Mapping Tables window in the J1 Desktop Common module (Task | Internet Configuration | Manage Mapping Tables).
There may also be several options available at the end of the column list in the Prepopulate drop-down menu that pre-populate a question with variable data. Following is a list of the possible variable options, the data that is returned for each, and the forms to which it is applicable:
Variable Option
Data Returned
Applicable Forms
ID Number
Returns the ID of the person for whom the data is being updated
All forms
Current Date
Returns the current date
All forms
Current Date and Time
Returns the current date and time
All forms
Current Time
Returns the current time
All forms
Gift Category (computed)
Returns a combined code consisting of
cat_comp_1 + '-'
+ cat_comp_2
Donor Profiles forms
REG_CONFIG.CUR_YR_DFLT
Returns the value defined as the current default year code from the REG_CONFIG table
Student Forms
REG_CONFIG.CUR_TRM_DFLT
Returns the value defined as the current default term code from the REG_CONFIG table
Student Forms
TW_REG_CONFIG.DFLT_YR_CDE
Returns the value defined as the current default year code from the TW_REG_CONFIG table
Student Forms
TW_REG_CONFIG.DFLT_TRM_CDE
Returns the value defined as the current default term code from the TW_REG_CONFIG table
Student Forms
If you want to define a default value that to display for all users entering data in the form rather than being a piece of data that is specific to the ID/name for whom the data is being updated/submitted, select the Static option and enter the default value to be used in the Static value edit box, which is displayed when the Static option is selected.
A fourth pre-populate option is to populate the question dynamically.
Note
The Dynamic (selected via SQL from a database) pre- populate option is currently only available for the Text Field type of question.
Select the Dynamic (selected via SQL from a database) option from the Prepopulate drop-down menu.
Enter a query into the Enter your SQL statement text box.
You may use another question's response to determine the value to be used to pre-populate the question, or you may use the logged in user's ID or the user ID of the person for whom the submission is being made, as in the case where an advisor is submitting a Personal Info Update on behalf of a student.
If you do not wish for the question to be pre-populated, leave the Prepopulate option set to None.
You can define any pre-populated question to be "read only" by selecting the Read only checkbox that is displayed to the right of the Prepopulate drop-down menu.
Use the Orientation field to specify how the question text is positioned relative to the field where the user enters a response.
In the Option Type field, select Static or Dynamic.
Selecting the Static option indicates that there are a pre-defined series of options that you always want to provide to the user. You can define the available options by completing the following steps in the Static Options area of the screen:
Enter the text that you want the user to see in the Display Text field.
Enter the corresponding code that you want saved to the database in the Database Value field.
Selecting the Dynamic option indicates that the options will always be selected via a SQL SELECT statement from the database.
Enter the appropriate SQL statement in the text area provided. The query should return two values: data to be displayed for the user (Display Text) and the corresponding code that should be saved to the database (the Database Value). The Database Value should be the first piece of data returned by the query, while the Display Text should be the second piece of data. If only one value is returned by the query, then that value is used as both the Database Value and the Display Text.
You can define a query that returns the same values all of the time (i.e., for a list of states). However, you can also define a query that is dependent upon some other value. The variables available for creating a dependent question are as follows:
A user's response to another question: Enter '{S#Q#}' in your query to indicate the section and question upon which to base the values of this drop-down menu.
The logged-in user's ID or the ID Number for whom the data is being updated, as in the case where an Advisor may be submitting an update for a student: Enter {UserID} in the query to use the ID as part of the query (i.e., the student's ID).
The logged-in user's ID if the user is submitting a form on someone else's behalf: Enter {AdminID} to use the ID of the third- party submitter (i.e., the Advisor's ID) in the query. For help creating a dependent question, select the Click here to read more links in the Dynamic Options section of the screen.
If this is not a dependent question, you can use the Test SQL command button to make sure that your query is valid.
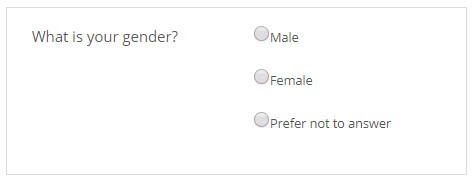
If you want to view the details of the question or see a preview of how it would appear on a form, click the Preview this question link. From the View a Question screen, you can Edit this question, which returns you to the Add a "Multiple Choice" Question page, or click the Back to previous screen link, which also returns you to the Add a "Multiple Choice" Question page.
Click Save. The system saves the question and again displays the main editing page for this form.
Note
The File Upload question type is only available to the Student Forms feature.
Open the form for editing.
Navigate to the appropriate section and click the Add a new Question link. The Choose a Question Type screen displays several options.
Note
You can click the Select a new question type link at any time prior to saving the new question to return to the Choose a Question Type screen.
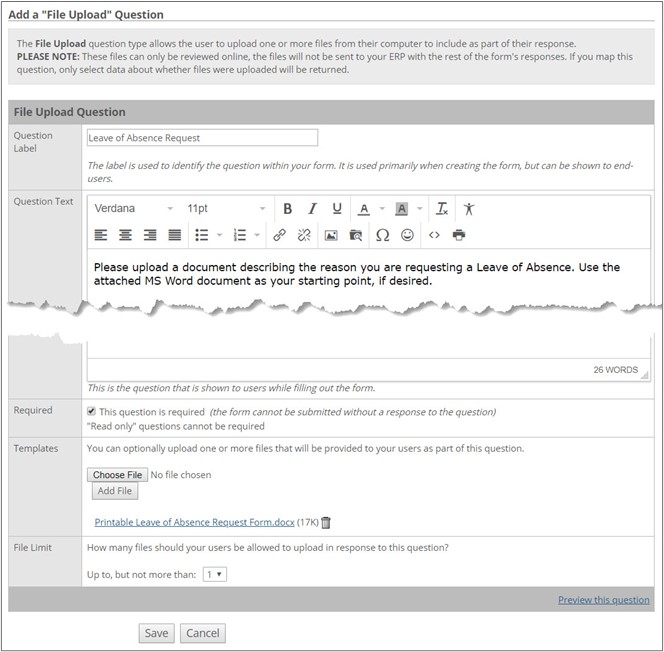
Click the File Upload question type link. The Add a "File Upload" Question page is displayed.
In the Question Label field, enter a label for the question. An entry in this field is required. You should enter a name that is meaningful, as this is the label that identifies the question within Form Builder. It might also be displayed to end users in some situations.
In the Question Text field, enter the question to be displayed on the form. An entry in this field is required. You can use the formatting tools at the top edge of the text box to change the font of your text, add emoticons, etc.
If you want the question to be required, select the Required checkbox.
If you wish to display one or more template files to the submitter:
Enter the path and filename to the file in the Templates text box.
- or -
Click on the Browse button to open the File Upload dialog box. Navigate to the location of the file you wish to add, select the filename, and click the Open button. The selected file is entered into the Templates text box.
Click the Add File button. The selected file displays as a link under the Browse and Add File buttons.
Repeat the procedure to add other template files.
Note
Clicking the displayed link opens the file. Clicking the trashcan icon (
 ) next to the link prompts you if you wish to remove the template file from the question. Clicking OK at the delete prompt removes the file from the question.
Select from the File Limit drop-down menu the maximum number of files that the submitter is allowed to upload. The maximum number of files can be defined as a value ranging from one (1) to six (6). The default value is one (1).
If you want to view the details of the question or see a preview of how it would appear on a form, click the Preview this question link. From the View a Question screen, you can Edit this question, which returns you to the Add a "File Upload" Question page, or click the Back to previous screen link, which also returns to the Add a "File Upload" Question page.
Click Save. The system saves the question and again displays the main editing page for this form.
If you want to use one or more questions that already exist in another form, you can import them. If you import a dependent question, always double-check the section number and question number of the parent question and, if necessary, update the SQL to ensure that the dependent question is referencing the appropriate parent question.
If you import a question from one of the sample forms, you should check the properties for each imported question to ensure that they are defined and/or mapped as you would like. For example, some drop-down questions in the sample form use dynamic SQL to retrieve the available options. You should ensure that the query results are as you expect based on the data in your J1 database and then modify the query if necessary.
Note
Before importing questions from one Donor Profiles form to another, be sure that the question is mapped to a column that is appropriate for the data category being edited.
Open the form for editing.
Navigate to the appropriate section, and click the Import Question(s) link. The system displays the Import Questions screen.
To search for a question or header without opening another form:
In the Search for a Question box, enter search criteria. You cannot use wildcards in your search, but you can enter a partial word.
Click the Search button. The system returns a list of all the questions and headers that meet the criteria you entered.
Select the checkbox beside the questions and headers that you want to import.
Click the Import Selected button. The Form Builder: Name of your form screen is displayed with the imported questions listed at the end of the appropriate section.
To browse a form to select questions or headers:
Go to the Browse Forms: area of this screen, which contains a list of all the forms that exist for all instances of this feature. If you click through to look at the text of any header/question, you lose your search results.
Click the name of the form that you want to browse. A screen listing all of the form’s sections is displayed.
To browse a section, click the name of it. A screen listing all questions and headers in that section is displayed.
Using the checkboxes at the left, select the questions and headers you want to import.
Click the Import Selected button. The Form Builder: Name of your form screen is displayed.
When you are finished working with this form, click the Done button.
Note
If you want to view the details of a question/header or see a preview of how it would appear on a form, click the Question Label. Click the Back to previous screen link to return to the Import Questions screen.
You can modify a question's properties, such as the text (as displayed on the form to users), its label (the name that identifies the question within Form Builder), orientation, etc.
Open the form for editing.
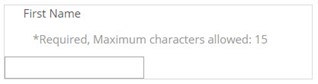
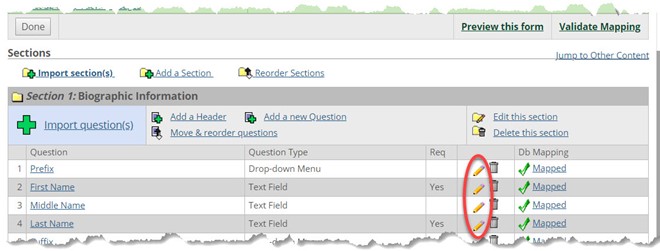
Locate the question you want to modify (for example, First Name).
You can navigate to the Add a "XXX" Question screen in two ways:
Click the corresponding pencil icon.
The Add a "XXX" Question screen is displayed so that you can edit the question.
When you have finished previewing, testing, etc., click the Save button.
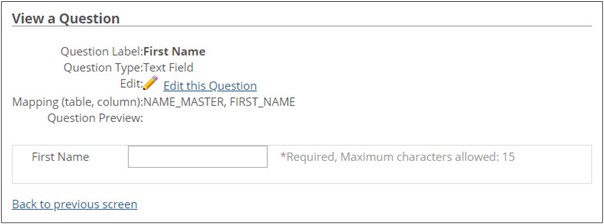
Click the name of the question that you want to modify. The View a Question screen, which includes a preview of the question and details about its mapping, etc., is displayed.
Click the Edit this Question link. The Add a "XXX" Question screen is displayed so that you can edit the question.
When you have finished previewing, testing, etc., click the Save button.
You can delete a question from the form. However, if you delete a question and if it was the only question mapped to a particular row, that mapping row is deleted also, thereby deleting any custom data mappings you have set up for that row.
