My Financial Account
The My Financial Account feature allows you to see all your account balances in one location, make payments, and see any important notifications for your account.
Tip
Account information cannot be viewed while the Business Office runs a recalculation (recalc) on the system.
By clicking the View account details and history link, you will be able to see all of the charges and payments that make up your account.
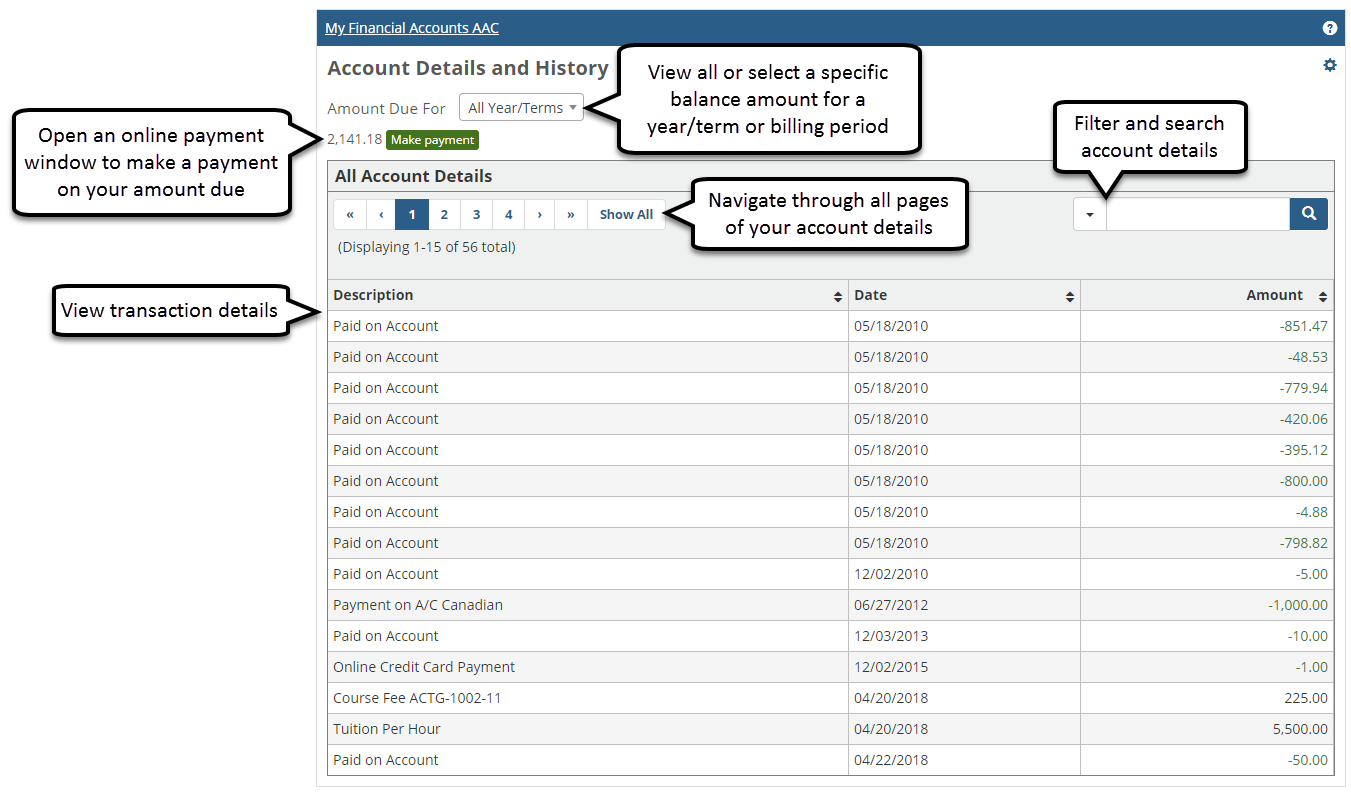
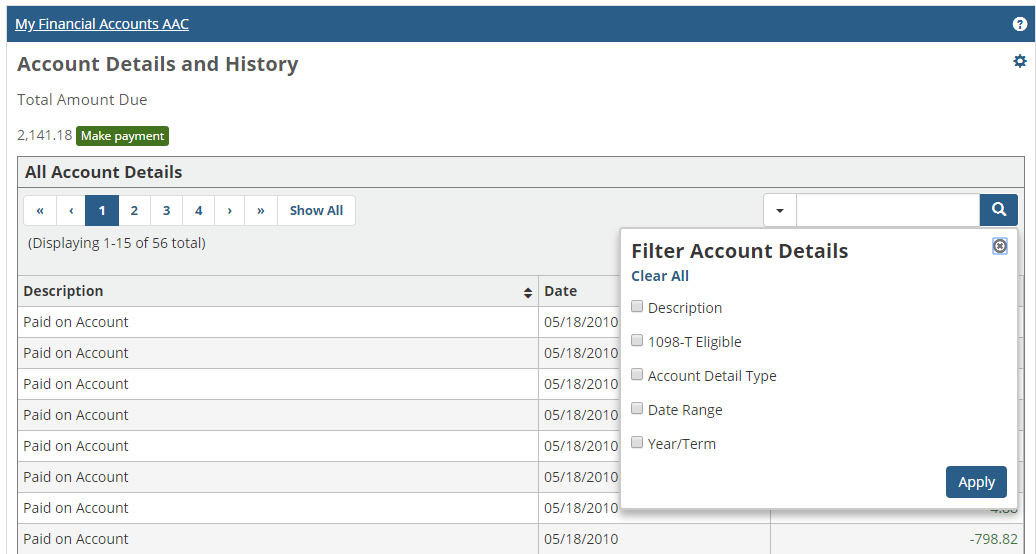
From the search box, click the down arrow to open the Filter options. Select the options you want and click Apply. Your listed account details will update.
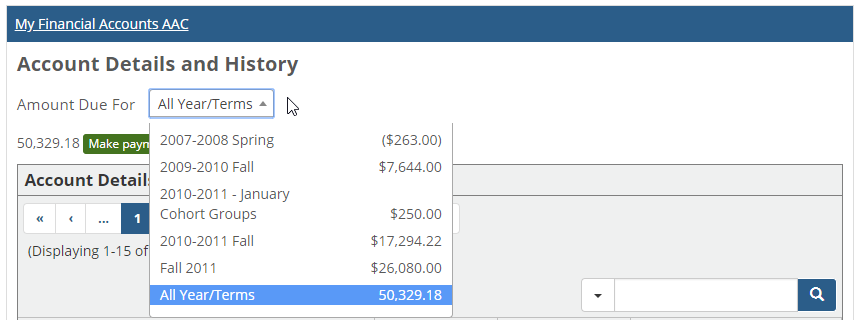
From the Amount Due For drop-down, you can choose to view your amounts for a specific time period or you can view your total balance. Your listed accounts will update.
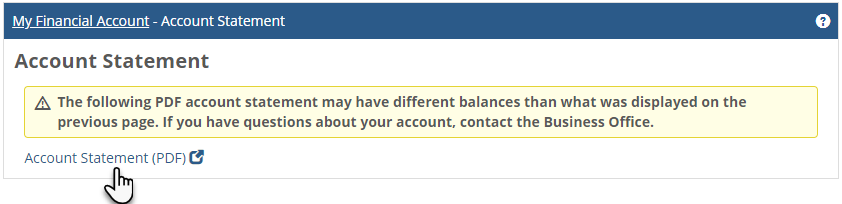
The My Financial Account feature allows you to see real-time updates to your account balances from the Account Details and History page. If you would like to print a copy of your account details, you can click the Account Statement link from the main My Financial Account or Account Details and History page. When you click the link, a new webpage will open with a PDF of your balance as of the time you click the link.
Warning
Please be aware that your printed statement may show a different balance than the amount that appears on the Account Details and History page. If you have questions about your balance, you should contact your Business Office.
Note
You will be able to make a payment online only if your school has the online payment feature set up. If you do not see a Make payment button, you will need to contact your school’s business office to make any payments on your plan.
Making a payment online is quick and easy. Throughout the Campus portal you may see the green Make Payment buttons. When you click the button, you will be able to enter the amount you want to pay and continue to enter your credit card information.
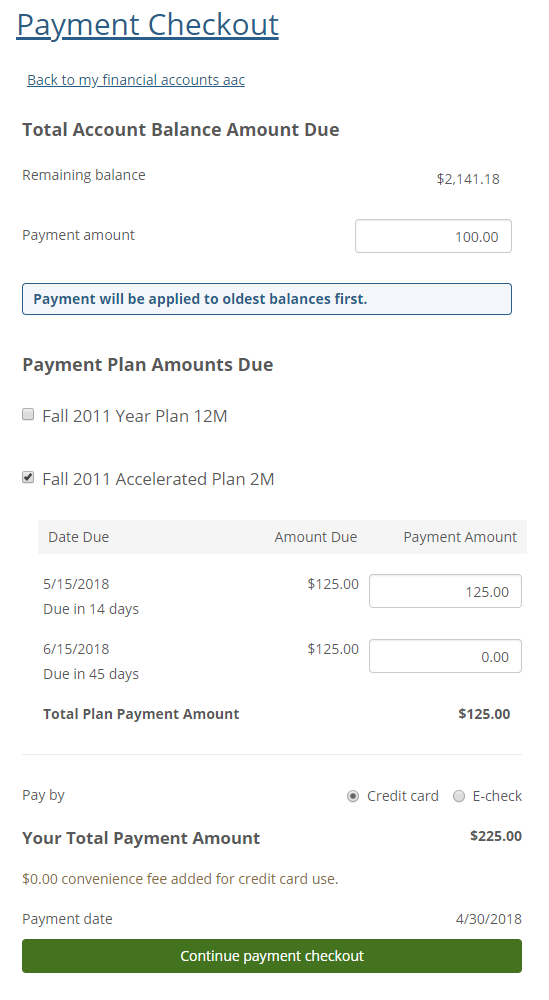
From the Payment Checkout window, you will see the total account balance at the top. For quick payment, you can enter the amount you want to pay in the Payment Amount field then click the Continue payment checkout button at the bottom.
Tip
Any payment made on the total balance will automatically apply to the oldest balance first.
If you have a payment plan, you will see the Payment Plan Amount Due section (just below the Total Account Balance Amounts Due section). You will see a list of due dates and amounts, and can make a payment directly on a due date. If you make a payment for more than the due amount, any additional amount will automatically be applied to the oldest balance first.
If you have more than one payment plan, you can select the checkbox next to the plan title to open a list of due dates and amounts. You can pay on multiple plans by entering an amount next to the due dates. You will see a total amount at the bottom of the window.
Warning
Payment Amounts entered on the Total Balance and Payment Plans sections are cumulative. If you put an amount in the Total Account Balance Amount Due section and put an amount in the Payment Plan Amounts Due section, you will be paying the total of those amounts.
Be sure to check your final total at the bottom of the page before clicking Continue payment checkout.
 |
From the Payment Checkout page, enter your Credit Card information and click Pay Now.
Note
On the Payment Form, you will see the standard payment fields which your school requires for making the payment online.
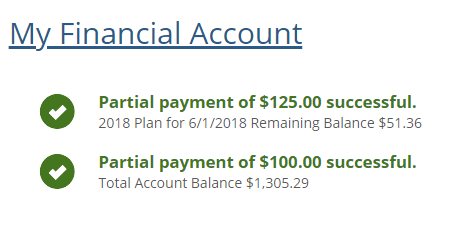
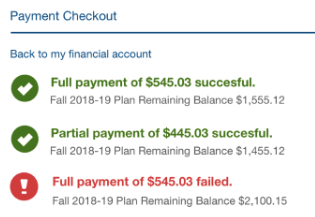
Once you have completed the payment you will see the Payment Receipt page, and if you go back to the Campus Portal tab, you will see a list of the payments made.
Tip
If a payment was not successful, you will see the payment listed in red with a payment failed message.
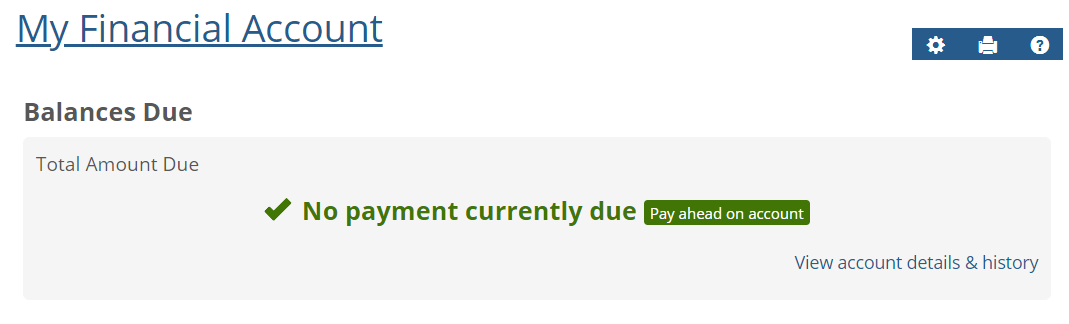
If you have a $0.00 balance on your account, the Make payment button will appear as Pay ahead on account. When you click this button you will go through the Checkout process and any money paid will appear as a credit on your account.
Check to see what balance you are viewing in the Amount Due for drop-down. You may be looking at all of your totals rather than a specific total you were expecting.
If you are not sure where one or more of your charges came from, contact your school’s Business Office for more information.
You may see charges listed on your account separate from a payment plan payment. This happens when fees are associated with your payment plan and they appear as miscellaneous charges on your account. To see the details of your plan, click the plan name from your Payment Plan page. If you think the charge is incorrect or you are unsure why a charge is appearing on your account, contact your Business Office for more information.
If you have a past due balance for your account, you will see “Past Due” in red below the amount due. If you have balances in multiple time periods that are past due, next to your Total Balance Due there will be a red warning icon ( ), when you click the icon you will see which time periods are past due.
If your account is up to date, you will see “No payment currently due” in green at the top of the portlet.
Yes. Even if you do not have a current balance you can make a payment on your account. If you have a zero balance, the Make a payment button will appear as Pay ahead on account. When you pay ahead, money will appear on your balance as a credit and be applied to charges when they are posted to your account.