Creating a Form
You create a form by giving it a name and adding content to it.
Note
Forms will already be created for some features by default. The forms for the Donor Profiles, Add/Drop Courses, and Student Registration features are already created. Also, forms are automatically created in the Employment Position Management feature when a position request is approved and the Application form is first edited.
Warning
These forms cannot be deleted, and new ones cannot be created; however, these forms can always be altered to meet your needs.
The following form creation steps are currently only applicable to the Apply Online, Make an Inquiry, Set FERPA Permissions, and Student Forms features.
Log in to JICS as an Administrator.
Navigate to the appropriate feature, and click Admin this portlet. The Admin screen for the feature is displayed.
Click Add a New Application or Add a New Form, depending upon the feature you are viewing.
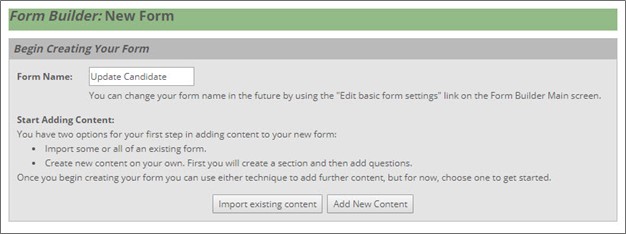
Enter a name for the form in the Form Name field, and click either Add New Content or Import Existing Content.
If you click the Add New Content button, you will be prompted to enter a Section name and optionally an image file and additional text. Clicking the Save button on the Add a Section screen opens the Form Builder: Name of your form screen. From this point, you can add an introduction, instructions, sections, questions, and headers as desired.
If you click the Import Existing Content button, the Import Sections screen is displayed.
Note
You must create at least one section for each form.
Once you have finished building your own content or importing questions and/or sections, click the Validate Mapping link to validate your form.
See how the form will appear to users by clicking the Preview this form link.
When you are satisfied with the form, click Done on the Form Builder: Name of your form screen.