My Students
Important
Student information and access to the links below may vary according to the permissions associated with your role. Some permissions are determined by the students and others by the school. For more information, contact your campus support team.
View information about students from this feature. You can see information for any student who has given you FERPA permissions through the Set FERPA Permissions feature.
Available Student Information:
The My 1098-T Info feature allows a student or their parents to view 1098-T information that has been accumulated for a given calendar year in preparation for claiming tuition paid as a tax deduction. The feature displays preliminary Financial Aid, charges, and posted transactions, including the student's 1098-T Name, 1098-T Address, and information for each required box on the 1098-T Form.
A link, Go to my 1098-T Info is displayed to the right of each piece of data. Clicking this link opens the 1098-T Tuition Statement Data screen that shows a detailed list of transactions that were used to calculate information for the specific box from the 1098-T form selected. Each transaction shows a Description, Date that the transaction was applied, the Value of the transaction, and the Term of the transaction.
Tip
1098-T Info is a legacy feature. 1098-Ts are now available in the Financial Document Center.
The Course History feature displays all courses in which the student was enrolled at the institution. The courses are displayed by Term and Course Code. The Title, Division, Credits, Grade Type, Grade, and Requirement (if available from J1 Desktop) are also displayed on the Course History Detail page.
If your school uses Competency Based Education (CBE) and if a course has competencies, parents can view competencies in the Course History feature by clicking the View CBEs button.
The Course Needs feature allows students to view all required course and group requirements that have not been satisfied for their selected or projected program of study. It also allows parents and others to view courses the student must take to complete their selected or projected program.
The Degree Audit feature provides degree information to users such as these:
Registrar
Dean
Advisor
Student
Parent
A degree audit verifies that the student is on track for graduation. While the Degree Audit feature is similar to the Course Needs feature, it provides a more detailed view of what the student needs to complete her program. Required courses, categories, and other requirements are displayed, indicating how many credits will be earned to complete the requirement as well as the current status of the requirement. If the requirement is a category or group requirement, you can view those elements that compose the category or group requirement. For each course requirement, you can view any current course offerings that would satisfy the requirement.
The Financial Aid Awards feature allows parents, students, and advisors to view Financial Aid awards for the student.
The Financial Document Center feature allows parents to link to their student's Financial Documents page for account statements and access their Tax Documents page for 1098-T forms.
The GPA Projection feature allows parents, students, and advisors to enter possible grades for their current classes and predict their term GPA and overall GPA. Students can also use this feature to provide two of three possible variables (Additional Credits, Average GPA for Additional Credits and Resulting GPA) and use these variables to calculate the third variable.
The Grade Report feature allows parents, students, and advisors to display and print their grades for a selected year and term (a single session).
If your school uses CBE, and the course has competencies, then the competencies appear on the grade report. If the competencies have grades, credits, and/or hours, these appear, too.
The Major Exploration and What If Scenarios feature uses some of the screens from the Course Needs feature to provide parents, students, and advisors with information on what is required to complete the selected program.
The Missing/Received Documents feature displays both the documents the Financial Aid Office has received from the student and a list of the missing documents needed to process the student's Financial Aid application.
From the My Financial Account link, parents can access their student's Account Details and History page and the Account Statement page. This will allow parents to see account details and balances due. Account details and balances can be viewed by year/term or billing period and parents can make a payment on the student's behalf.
If the info icon  is displayed beside a name, you can click the icon to view information about the person.
From the Payment Plan link, parents will be able to view their student's current payment plans and they can sign up for a payment plan on behalf of their student. Parents will also be able to make a payment on a payment plan (see the How To below).
The Residence Information feature allows parents, students, and others to view their current housing assignments.
The My Account Info feature allows you to view the student's current balance as well as a list of all prior transactions on her account.
The Student Schedule feature allows parents, students, and advisors to view student schedules (courses for which they are registered or pre-registered) for the current term for all divisions. They can view current or previous terms.
The Unofficial Transcript feature allows a student to generate and display their Unofficial Transcript by Division. The Unofficial Transcript displays the same information as an Official Transcript, which includes GPA information and detailed course information by Year and Term. Parents and others can view the unofficial transcript.
If your school uses CBE, and the student achieved competencies that the school elects to show, then the competencies appear on the transcript in either or both of these places:
Integrated with the course section
In a list of competencies at the end
How To
Note
You will be able to make a payment online only if your school has the online payment feature set up. If you do not see a Make payment button, you will need to contact your school’s business office to make any payments on your plan.
Making a payment online is quick and easy. Throughout the Campus portal you may see the green Make Payment buttons. When you click the button, you will be able to enter the amount you want to pay and continue to enter your credit card information.
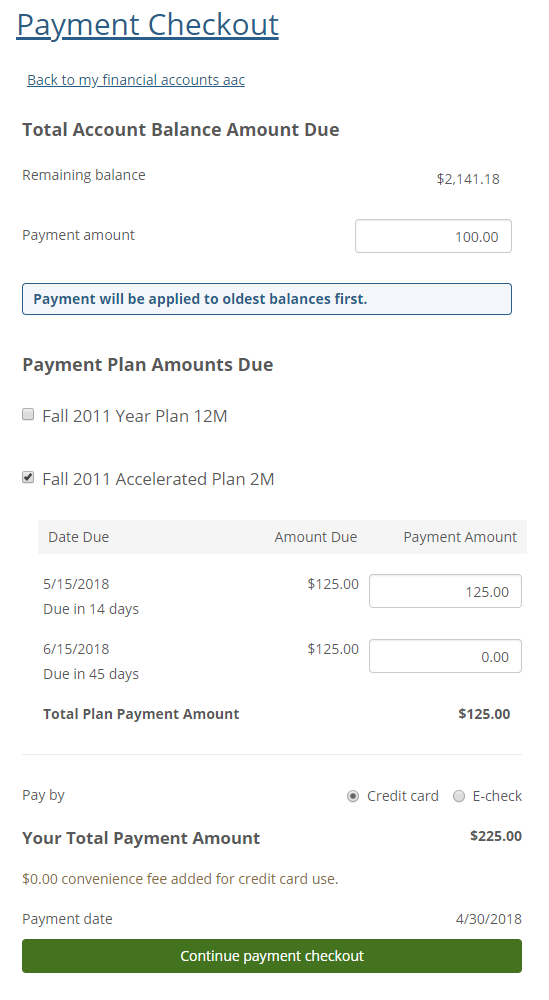
From the Payment Checkout window, you will see the total account balance at the top. For quick payment, you can enter the amount you want to pay in the Payment Amount field then click the Continue payment checkout button at the bottom.
Tip
Any payment made on the total balance will automatically apply to the oldest balance first.
If you have a payment plan, you will see the Payment Plan Amount Due section (just below the Total Account Balance Amounts Due section). You will see a list of due dates and amounts, and can make a payment directly on a due date. If you make a payment for more than the due amount, any additional amount will automatically be applied to the oldest balance first.
If you have more than one payment plan, you can select the checkbox next to the plan title to open a list of due dates and amounts. You can pay on multiple plans by entering an amount next to the due dates. You will see a total amount at the bottom of the window.
Warning
Payment Amounts entered on the Total Balance and Payment Plans sections are cumulative. If you put an amount in the Total Account Balance Amount Due section and put an amount in the Payment Plan Amounts Due section, you will be paying the total of those amounts.
Be sure to check your final total at the bottom of the page before clicking Continue payment checkout.
 |
From the Payment Checkout page, enter your Credit Card information and click Pay Now.
Note
On the Payment Form, you will see the standard payment fields which your school requires for making the payment online.
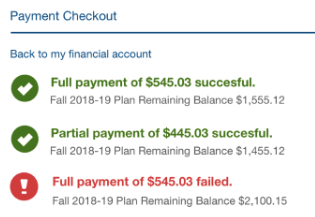
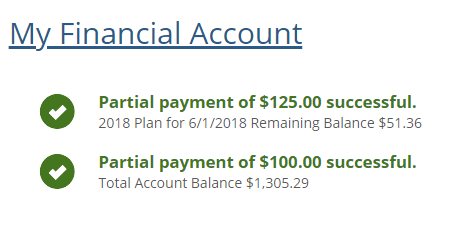
Once you have completed the payment you will see the Payment Receipt page, and if you go back to the Campus Portal tab, you will see a list of the payments made.
Tip
If a payment was not successful, you will see the payment listed in red with a payment failed message.