- Jenzabar Campus Portal Features Help Hub
- Campus Portal Features Online Help
- FormFlow Forms & Workflow
- FormFlow - Forms
- Form Basics
- Working with Questions/Fields
- Question/Field Types
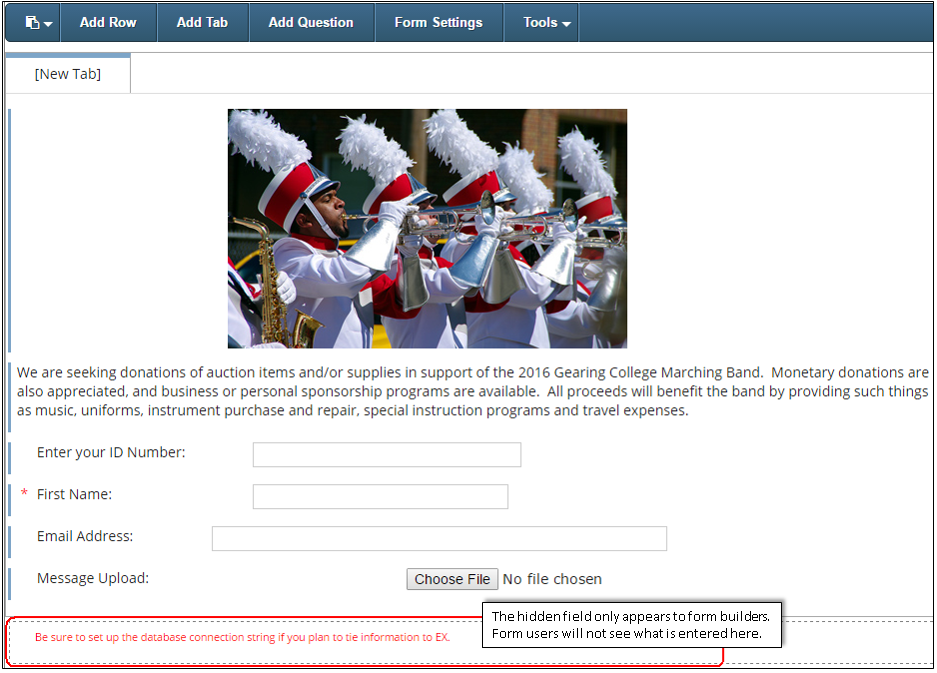
- Hidden
Important
Information and features vary according to the roles to which you belong and the permissions associated with those roles. For more information, contact your module manager or your campus support team.
The Hidden question type lets you add information to your form that only other form builders can see. You can include instructions for setting up the form.
Log in to the Campus Portal as an administrator and access FormFlow - Forms.
Click Manage Forms.
Click on the form you want to update. The admin view of the form displays.
Click Add Question.
Enter a Unique ID for the hidden field.
From the Type drop-down list, select Hidden.
In the Text field, enter and format the label you want to use to describe the hidden field.
Use the Text Position options to move it to the top or right.
If you are grouping fields, enter the group name in the Group field.
Note
Each question being included in the group must have the same group name in this field.
If you are using a collection grid:
Select the grid you are associating the hidden field with from the Grid drop-down.
Select the appropriate Grid Function from the drop-down.
Click Save changes.
Log in to the Campus Portal as an administrator and access FormFlow - Forms.
Click Manage forms.
Click on the form you are working with.
Right-click on the question and select Properties to open the Edit Item pop-up.
Click the Settings tab.
Use the Alignment options to move it to the center or right.
Set up the attributes:
If you want to make a question/field only visible in the report view or FormFlow - Workflow, select the Show Only in Report checkbox.
The Hide On Load setting can be used to hide a question on the form until another action takes place.
Caution
This setting will soon be discontinued. To show/hide a question, use the Rules tab.
If you want the hidden field to be included in the form report, select the Include in Report Grid checkbox.
If you want to allow a user to submit the form as another user, select the Use ID Number Value to Override Submitter's ID checkbox.
Notice
A faculty member wants to submit a major change form on behalf of their student. When this setting is defined, the Submitter ID will be overwritten with the ID Number in this question instead of the ID Number of the user submitting the form.
To have a hidden field automatically show default information when the form builder accesses the form, enter it in the Default Value field.
If your hidden question includes a value amount mapped to a selected Payment Profile, and you want to double the final balance amount, select the Add Double Value to Final Balance checkbox.
Tip
We recommend that you use the Balance Calculator to modify the final balance as this setting will eventually be discontinued.
If your hidden question includes a value amount mapped to a selected Payment Profile, and you want to multiply the amount by the Fee Amount in the Payment Profile, select the Multiply Balance by Double Value checkbox.
Tip
We recommend that you use the Balance Calculator to modify the final balance as this setting will eventually be discontinued.
Notice
An event participant is registering for an event and they have 3 guests attending with them. There's a fee and when they select the number attending this will multiple the fee of the event by 4.
If you are associating the hidden field with information in J1 Web Events, select the appropriate event field from the Map to J1 Web Event Field drop-down options.
Important
This option is only available to schools with a J1 Web Events Management license.
In the Help Info Text field, enter additional information or brief instructions for form builders.
Note
Help information is shown next to a help icon that shows your text when the form builder hovers over or clicks on it.
Important
This option is only available to schools with a Candidate license.
Click Save changes.
Log in to the Campus Portal as an administrator and access FormFlow - Forms.
Click Manage Forms.
Click on the form you are working with.
Right-click on your form question and select Properties to open the Edit Item pop-up.
Click Rules.
Click Add Step.
In the first drop-down, select the If answer value is condition.
Note
Rules MUST ALWAYS have an If answer value is condition in the first statement of the sequence. This tells FormFlow to execute the action if the user's answer matches the answer value you specify.
In the answer value field to the right of the drop-down, enter the answer value that will trigger the action to execute.
Tip
If you want the action to execute if any answer is entered, or if you are setting the action to trigger when a button is selected, enter * in the answer value field.
In the third drop-down, select the action you want to happen.
To show the form user a message, select Alert: Show message. A blank field appears where you can enter text you want shown in a pop-up notification. This can be useful when you want to notify the form user about their choice.
To show or hide other form options based on what the forum user selected, use the group clear, hide, show, and toggle options.
Click Add Step to add another action.
Select one of the following conditions from the drop-down list:
Else if answer value is tells FormFlow to execute the action if the answer value matches the new answer value you specify when the "If" condition fails.
Else will tell FormFlow to execute the action if no previous conditions were met.
And will tell FormFlow to execute the action in addition to any other action that is set to execute in the previous rule condition.
Use the drop-down and answer value field to define what actions you want to occur when the form user is working with a question.
Repeat steps 10-12 to add as many actions as needed.
Click Save.