Defining Data Mappings
In order to define the data mapping for both hidden data items and questions, you need to define the mapping table and the mapping column to associate with each form element. For some mapping tables, you may also need to define which row to use for the mapping. Additionally, for each mapping table and row, you can define any custom data that is needed for the row. You will use the following three screens to map form elements to the J1 Desktop mapping tables and columns: Mapping: Choose a Table, Mapping: Choose a Row and Mapping: Set up Mapping.
Tip
If the data about the available tables is not what you expected, the problem may be that JICS is not reflecting the most recent changes made in J1 Desktop. To alleviate this problem or rule this out as a problem, clear the JICS cache.
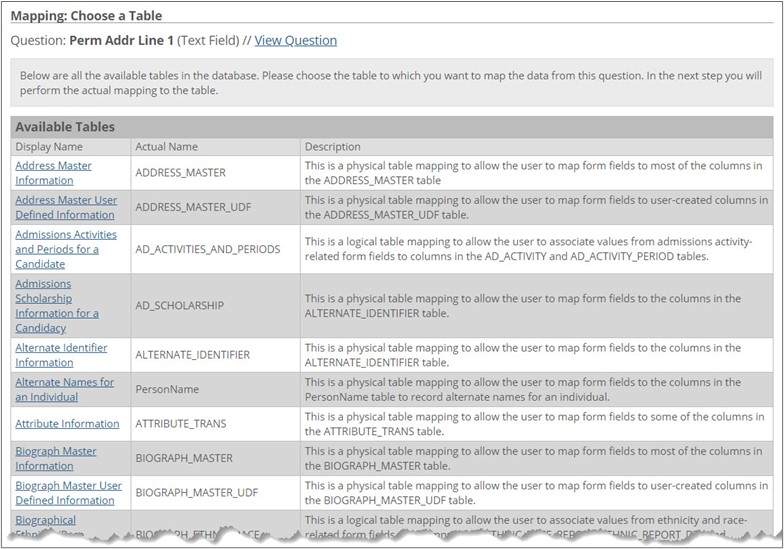
When mapping a question or hidden data item for the first time or if changing the table for a currently mapped form element, you will see the following Mapping: Choose a Table screen, which shows all of the mapping tables available to the currently selected form.
Note
By default, only certain model J1 Desktop tables are available for mapping within JICS for each form type. However, it is possible to make custom tables available.
 |
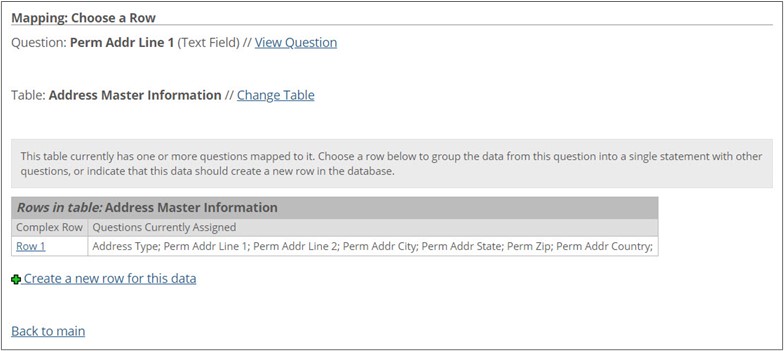
If you click on a mapping table name on the Mapping: Choose a Table screen and one or more form elements are already mapped to this table, the system displays the Mapping: Choose a Row screen that summarizes the row or rows that the current mapping dictates.
Click the name of any row to see details about it via the Mapping: Set up Mapping screen.
 |
If you click on a mapping table name on the Mapping: Choose a Table screen and no questions are currently mapped to this table or if you click on a Row number link or create a new row for a mapping table on the Mapping: Choose a Row screen, the Mapping: Set up Mapping screen is displayed. It displays details about a table that is available for mapping. If one or more questions have already been mapped to this table, then the information on this screen is specific to a particular row in the table.
 |
You can use the Mapping: Set up Mapping screen to map data in several ways, including:
Mapping a question to a column
Creating custom data to be inserted into a column
Specifying that the user ID of the person submitting the form should be inserted into a column
Nullifying any data that already exists in a column
Specifying that a column should maintain its default value
Note
In order to save a row, at least one of the mappings for the row must involve a user’s response to a question. For example, you cannot save a row that has only a custom data mapping or which only has a user ID mapping.
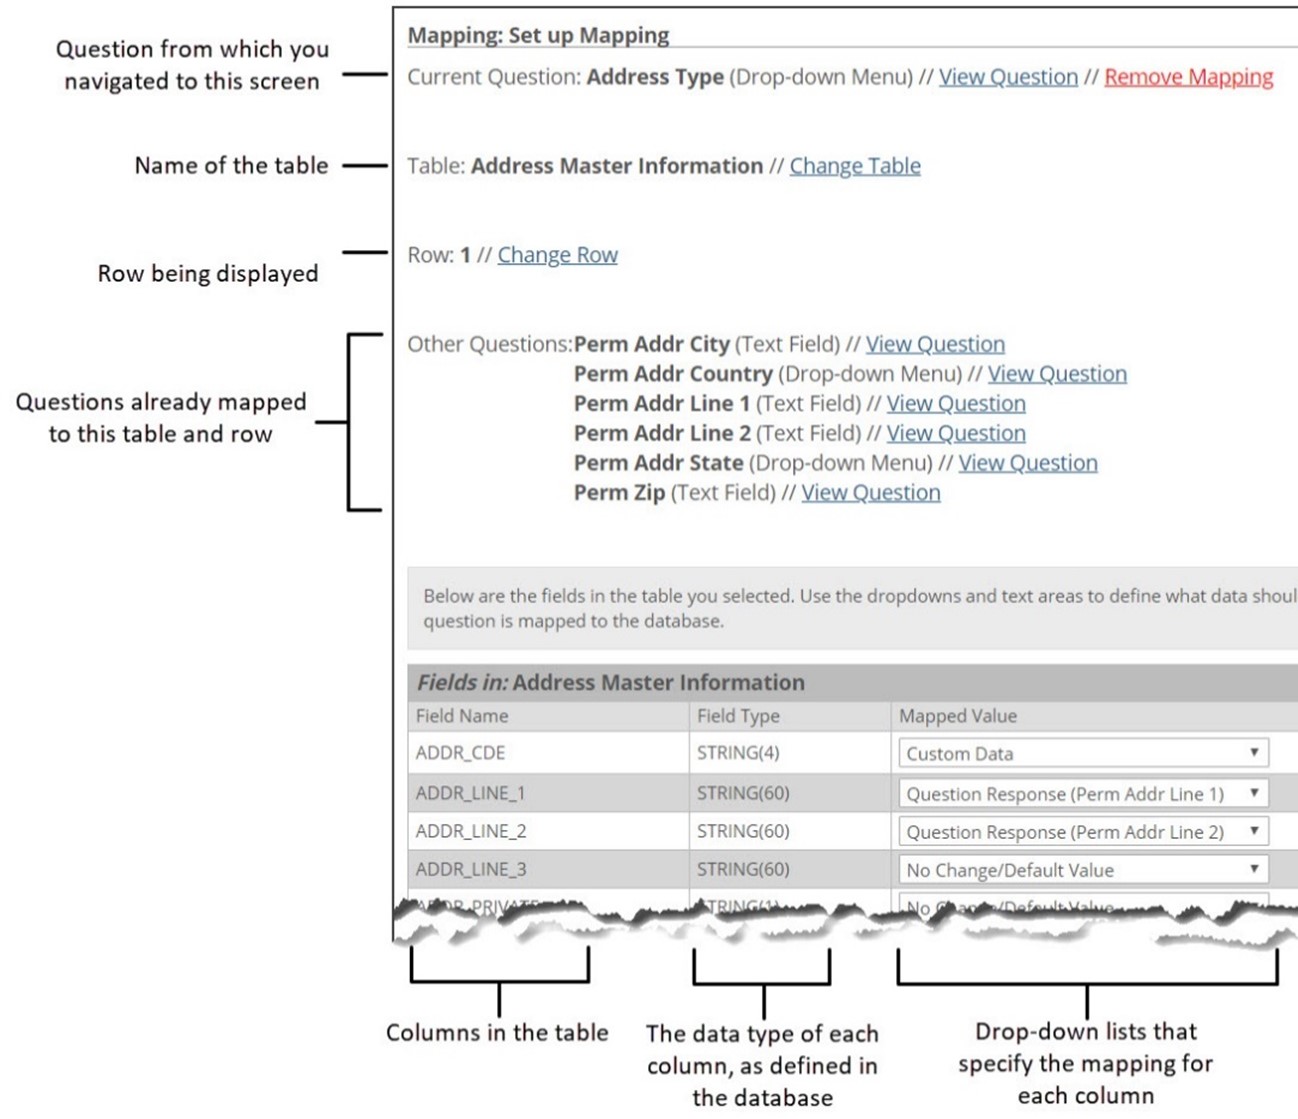
The elements of the Mapping: Set up Mapping screen include the following:
The Current Question is the question from which you navigated to the Mapping: Set up Mapping screen. You can map the current question to any of the columns listed on this screen, provided the column has the appropriate “field type.”
The Table field identifies the table detailed by this screen.
The Row field identifies the row detailed by this screen (this field is displayed only if one or more columns have already been mapped to this table).
The Other Questions area of the screen lists the other questions currently mapped to this table and row (if any). While on this screen, you can delete the mappings for any of these questions, or you can map these questions to different columns within this table.
The actual mapping is done in the Fields in table:
The Field Name column lists the columns in the table that are available for mapping.
The Field Type describes details about each column:
Data type (Date, String, Decimal, Integer)
Data Type
Number(s) in parentheses indicates
Date
n/a
String
Number of characters that can be entered
Decimal
First number: Number of bits defined for the column
Second number: Number of decimal places allowed
Integer
Number of bits defined for the column
Note
Amount of data that can be stored in the column; this value is represented by one or more numerals listed in parentheses after the data type; meaning of the number(s) varies depending on the data type.
The Mapped Value lets you specify how each column is to be mapped (if at all). If the column is not mapped, it is set to No Change/Default Value. The available options are described in the table below.
Option
Description
No Change/ Default Value
No mapping is defined for this column.
Question Response (xxx)
This column is mapped to the response for the question indicated by xxx.
Hidden Data xxx (yyy)
This column is mapped to hidden data element xxx, which has a static value of yyy.
User ID
The mapping column contains the user ID of the person submitting the form.
NULL
The mapping column contains the equivalent to a NULL value (i.e., nothing will be sent for this column).
Custom Data
A static value is defined for the mapping column.
To go from the Mapping: Set up Mapping screen to one of the previous screens in this process, use the breadcrumbs at the top of the screen. Be careful not to click Save at any point in this process. If you inadvertently made some change while viewing the tables and then clicked Save, you could modify the mapping for your form in a way that you did not intend.