Working with Introductions
Form Builder allows you to add an introduction to your form. For features that display all sections of a form on a single page, an introduction for the feature's forms is displayed as a section at the top of the page. For features where each section is displayed as a separate page, an introduction is also be displayed as a single page before the first page of the form. The introduction can consist of an image, text, or both. It can be created, imported, modified, and/or deleted.
 |
Form Builder allows you to create an introduction for your form.
Open the form for editing.
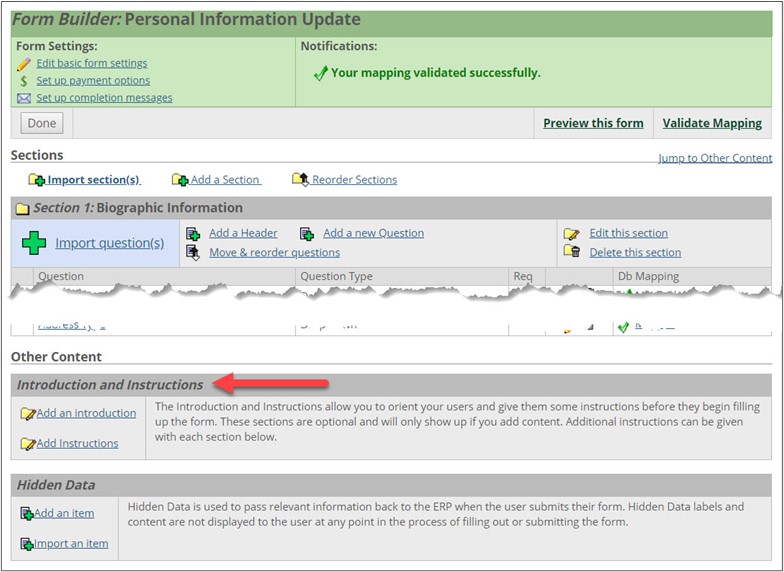
Scroll to the bottom of the screen, and click the Add an Introduction link. The Form Introduction screen is displayed.
Fill out the form as follows:
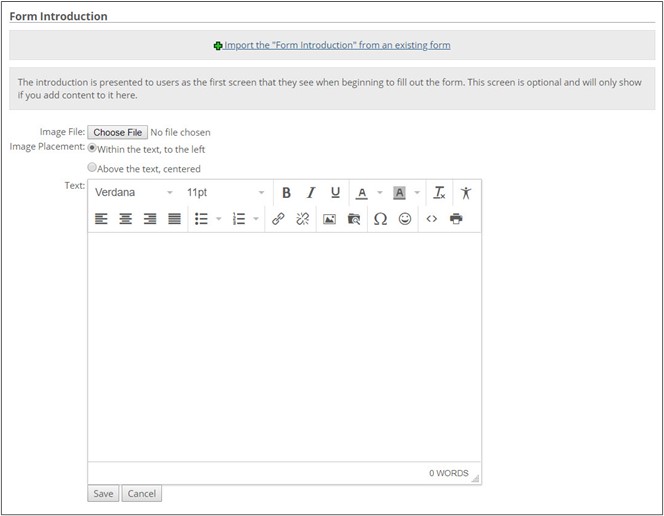
If you want the introduction to include an image, enter a path in the Image File field. You can use the Browse... button to locate the image.
If your introduction includes both an image and text, use the Image Placement radio buttons to specify how the image should be placed in relation to the text.
If appropriate, enter text in the Text field. You can use the editing tools at the top of the text box to customize the appearance of the text.
Click Save.
You can import an introduction into a form from another form in your system.
Open the form for editing.
Scroll to the bottom of the screen and click the Add an Introduction link or the Edit the Introduction link, whichever is displayed on the screen. The Form Introduction screen is displayed.
Click Import the "Form Introduction" from an existing form link. The Import Form Introduction screen is displayed.
Radio button options display next to forms that currently have an introduction defined. Use the radio buttons to select the form whose introduction you want to import.
Click Import Selected.
Click Save.
Form Builder allows you to modify the introduction on a form. You can delete the image displayed, add an image, change the text, reposition the image and text, and change the text.
Open the form for editing.
Scroll to the bottom of the screen, and click the Edit the Introduction link. The Form Introduction screen is displayed.
Modify any of the following:
To delete an existing image, click Delete this image.
To add an image, use the Image File field (displayed only if there is currently no image).
To modify the position of an image in relation to the text, use the Image Placement radio buttons.
Make any needed changes in the Text field. You can use the editing tools at the top of the text box to customize the appearance of the text.
Click Save.
Form Builder allows you to delete an introduction on a form.
Open the form for editing.
Scroll to the bottom of the screen and click the Edit the Introduction link. The Form Introduction screen is displayed.
Scroll to the bottom of the screen, and click the
 Delete Introduction link.
The system displays a dialog asking whether you are sure you want to delete the introduction.
Click OK.
The introduction is deleted and again displays the Form Builder: Name of your form screen.