Housing Application
Note
Housing Application is one of three features that make up Student Housing capabilities.
Student Housing
Student Housing is made up of three Campus Portal Student features: Housing Application, Roommate Request, and Room Selection. All three features work together to make Student Housing seamless and helpful for students and staff.
Student housing features, once configured in J1 Web and Campus Portal, allow students to apply for housing, choose a roommate group, and select a bedroom/suite for their group. Some administrative setup is done in J1 Web, while students use the features in the Campus Portal.
To apply for student housing, complete the housing application, being sure to carefully read all instructions and complete all required fields.
As you complete each section, click the Next button to proceed to the next tab.
If you need to, you can click Save and Quit to save your information and return later.
When you are finished and have reviewed your information, click the Submit button. You can only submit the form once.
If a payment is required, you will automatically be forwarded to the secure payment form. Complete the fields and click Continue.
Review your information and verify that it is correct, then click Continue.
When your payment is successfully completed, you will see a confirmation screen.
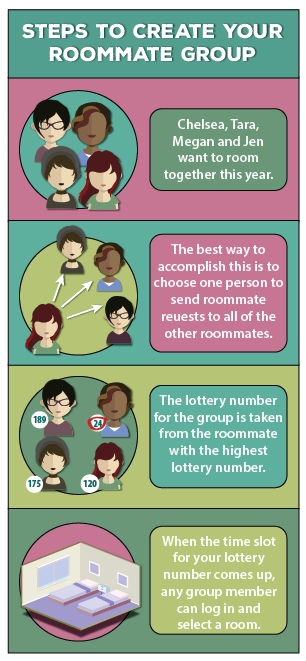
After submitting your housing application, you will receive an email with a link to the roommate request feature, with dates that it will be available. Once it is available, use the link to access the feature. Select your session, and choose which roommates you wish to select.
Once you have requested other roommates, others will not be able to request you as a roommate. Once you have accepted a roommate request from someone, you will not be able to send or receive any other roommate requests. The simplest way to ensure that your group becomes roommates together is for one person to send the roommate request to all others in the group.
In the Room Selection feature, select the session for which you have applied for housing. If the selection feature is available at the current time, a link to Browse Rooms will appear.
The Browse Rooms feature will show you all of the available rooms.
When you have chosen a room, click the Select Room button for that room.
You will see a popup asking you to confirm your choice, as you will not be able to change it after you confirm.
Now in the Room Selection feature, you will see your selected room, and any roommates in your group. If your roommate group has fewer people than the capacity of the bedroom, other applicants will be assigned.