Setting Up My Financial Account
J1 Desktop Setup
On this window, there are three fields that determine what is included in the student’s balance:
Display Preliminary Financial Aid Online?
Display Preliminary Charges Online?
Display Unposted Items Online?
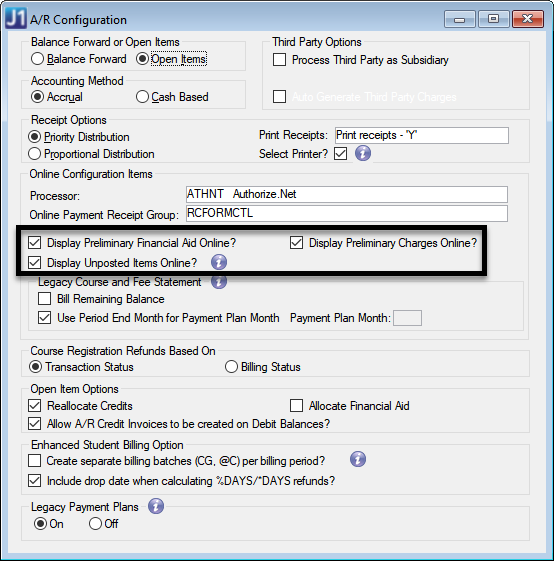
Check the A/R Configuration window to make sure the settings are correct for the unposted, suspended, unapplied financial aid, and preliminary charges when calculating the student’s balance.
A student's account balance is calculated using flags from General Ledger. Three flags are checked to verify student account balances. Be sure you have properly setup the following flags so the student account balances will calculate with the correct amounts:
Include in Account Balance checkbox on the A/P & A/R Subsidiary Definitions window
Payment Source Code? checkbox on the Define Journal Source Codes window
Include in Payment Plan Balance checkbox on the Define Journal Source Codes window
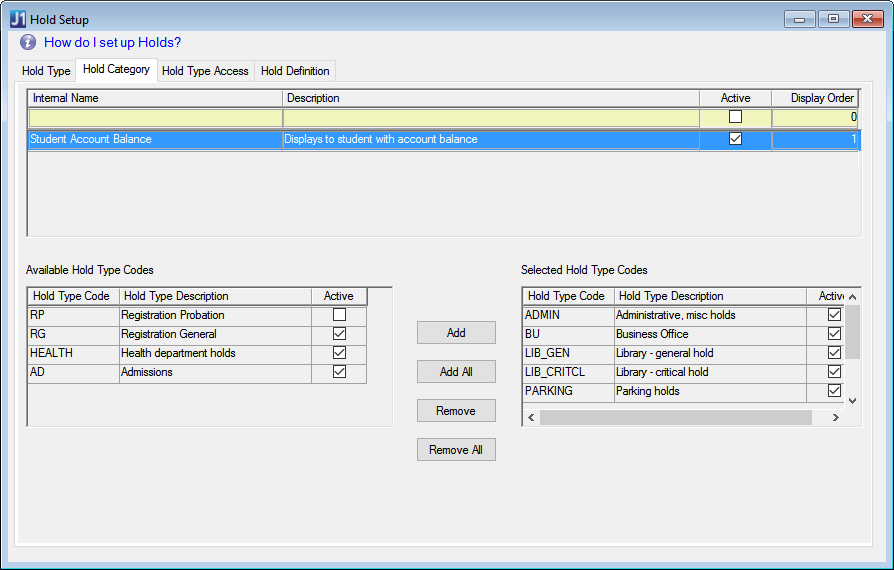
If you want holds to appear in the My Financial Account portlet in the JICS Campus Portal for students, you will need to identify holds and assign the Hold Category of Student Account Balance.
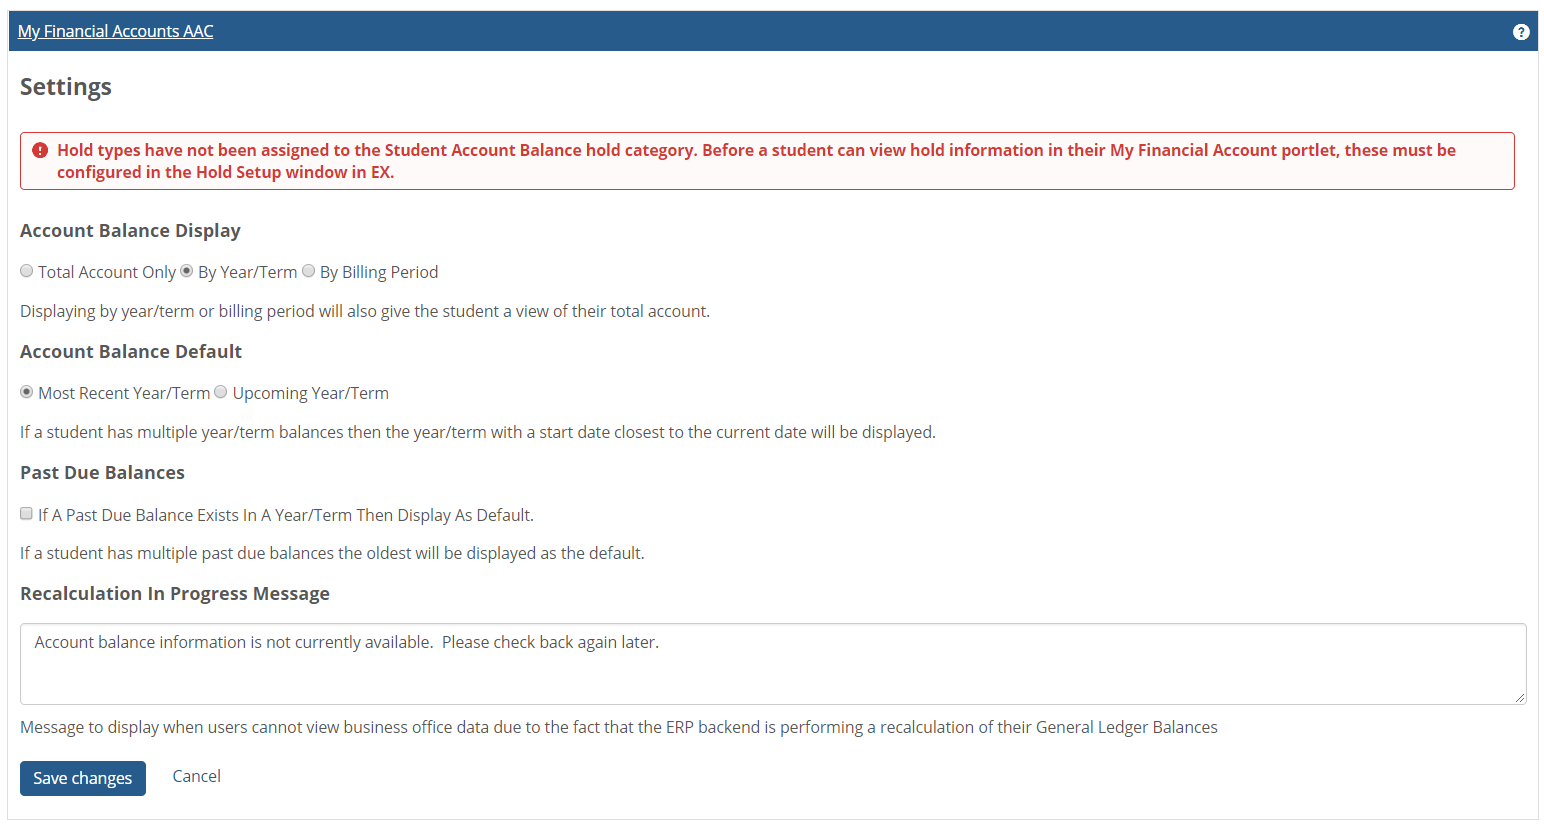
If you do not add holds to the Student Account Balance hold category, you will see a message in the portlet letting you know that students will not be able to view hold information in their My Financial Account portlet.
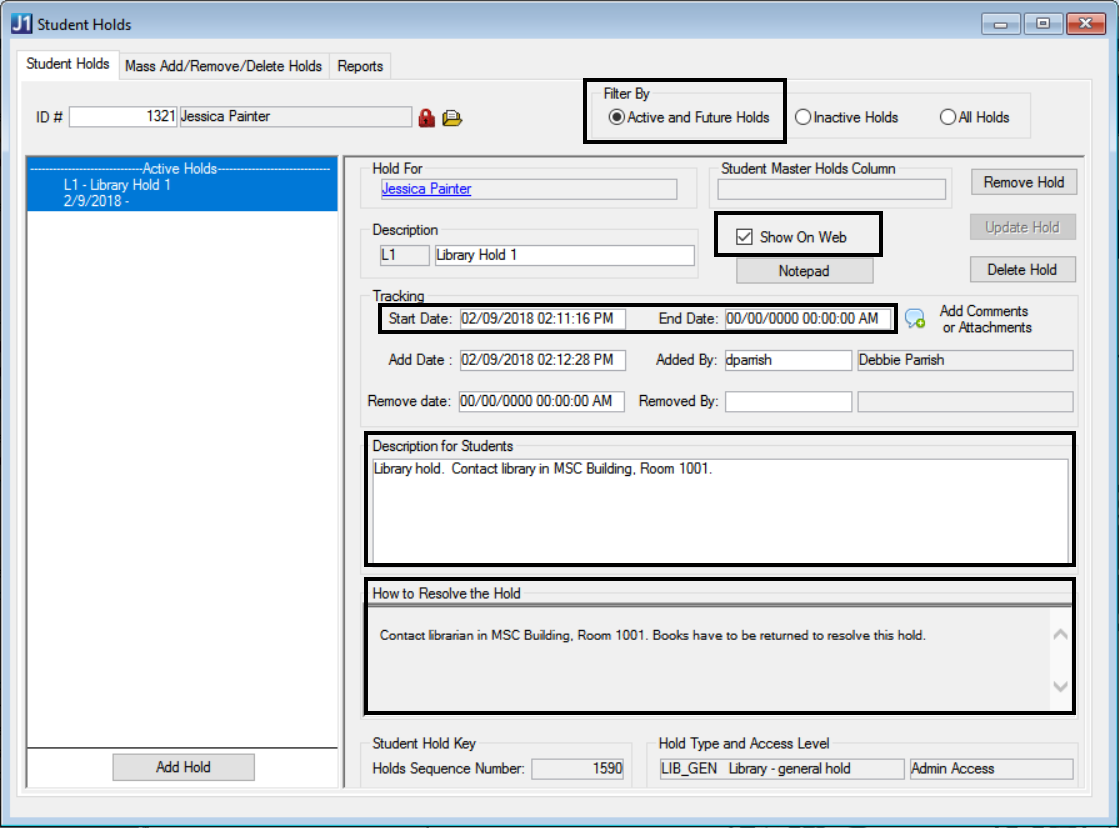
In order for students to see holds on their account from the My Financial Account feature, the following criteria must be met on the Student Holds window:
Status must be active or future
Show on Web must be selected
Current date must be between the start and end date
If a hold appears on the student’s account, they will be able to see why the hold appeared and how to resolve the issue. It is important for the Description for Students and How to Resolve the Hold fields are entered clearly.
Campus Portal Setup
Warning
When you open the My Financial Accounts Settings page, you may see a warning at the top of the page if your school is not using the launch out hosted payment form. If you see this warning, the Make Payment and Pay Ahead buttons will not appear in the Campus Portal and students will not be able to make online payments.
As an administrator, you are able to control the account balance default and how students will view their balance.
Log in as the Campus Portal administrator.
From the My Financial Accounts feature, click the Settings
 option.
From the Account Balance Display section choose one of the following:
Total Account Only: the total account balance will be displayed to the student.
By Year/Term: each positive year term balance will be displayed to the student, in addition to a total account option.
By Billing Period: each positive billing period balance will be displayed to the student, in addition to a total account option.
From the Assign Year and Term to Total Account Balances and Total Plan Payments options, choose an option that will determine the year and term to be applied to online student account balance payments not already associated with a year/term (such as a total account balance plans not associated with a specific year/term or billing period).
Your Choice of Year/Term: choose a year/term option from the drop-down that will be assigned to student payment transactions not already associated with a year/term. The year/term options shown in this list are pulled from the Year Term Subterm window in J1 Desktop where the Show on Web flag is selected.
Current Year/Term: when selected, the current year/term will automatically be selected and assigned to any student payment transactions not already associated with a year/term. The current year/term is pulled from the Registration Configuration window in J1 Desktop.
Year/Term Based On Payment Date: if selected, the system will assign a year/term to a student payment transaction for whichever year/term is currently within the begin and end date range from the Year Term Subterm window in J1 Desktop.
Year/Term Of Student's Oldest Balance: if selected, the system will assign the year/term to a student payment transaction from the year/term of the student’s oldest balance due.
From the Account Balance Default options, choose which balance will display first:
Most Recent Year/Term: if a student has more than one year/term or billing period on their account, they will see the one that occurs in the most recent past first.
Upcoming Year/Term: if a student has more than one year/term or billing period on their account and has a future account, they will see the earliest upcoming balance after the current year/term.
In the Past Due Balances section, decide if you want to override the normal account balance default and always show past due balance first. If selected, any past balances will be displayed to the student before any current or future balances.
In the Account Statement Access section, decide if you want students to be able to generate a PDF statement from their My Financial Account feature. When On, an Account Statement link will appear and create printable PDF of their account balances as of the time when they click the link. When Off, students will only be able to see their account statements in real-time from the Account Details and History page.
In the Recalculation In Progress Message section, write a brief message that students will see if the system is doing a financial recalc and the My Financial Accounts feature is unavailable.
Click Save changes.
Log in to the Campus Portal as an administrator and navigate to the appropriate feature page.
From the Admin Toolbar
 , click Access. The Access page appears. Campus Portal roles that have access to that page are indicated by a green visible
  symbol while roles that do not have access are indicated by the red hidden
  symbol.
Click on the Campus Portal role you are setting up permissions for. If the role has not already been granted access to the page, click the button to toggle it to Visible
 . Additional permissions appear.
To grant administrative privileges to a Campus Portal role, click the button for the Allow this role to manage this page permission to move the toggle to "Yes". Administrative permissions will allow the users in the role to add or remove features and set page and feature level permissions.
Changes are saved automatically.
Warning
If you want online payments to be available, you will need to make sure you are using Authorize.Net as a hosted payment form. If this is not set up, the Make payment and Pay Ahead buttons throughout the Campus Portal will be inactive.
Log in to the Campus Portal as an administrator and navigate to the Online Payment Administration feature.
Click the Click here to administer the Payments Portlet link.
Make sure the Use Authorize.net hosted payment form? option is set to Yes.
Tip
For more information about setting up and using Authorize.Net see the Online Payment Administration section of the help.